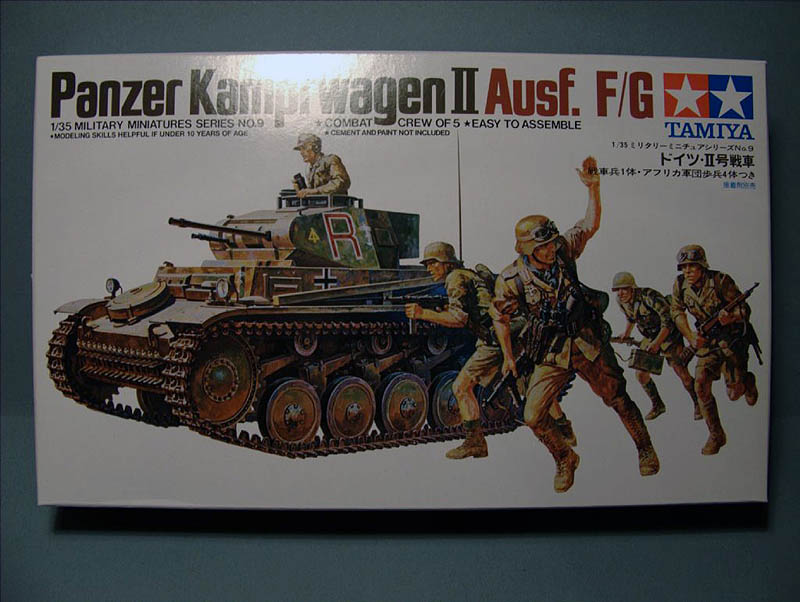
Panzer Kampfwagen II Ausf. F/G Tamiya 1:35 – Modeling
In line with my kits and thinking about a future diorama with the participation of the armies of D.A.K and R.A.F the latter with the kit jeep comando S.A.S I already started in another post, I started with the second and important element that will be part of this scene, a panzer II (Panzer Kampfwagen II Ausf. F/G), un kit de Tamiya a scale 1:35, a mold of the old that has easy mounting and perfect for new trials for the price, size and quality of the plastic, Panzer II was one of the first German armored, but the history of this car we left for the "A little history", the idea is to represent a hit or destroyed and abandoned car, I'll see which would be best in the diorama.
El kit en cuestión:
A little background on the Panzer II:
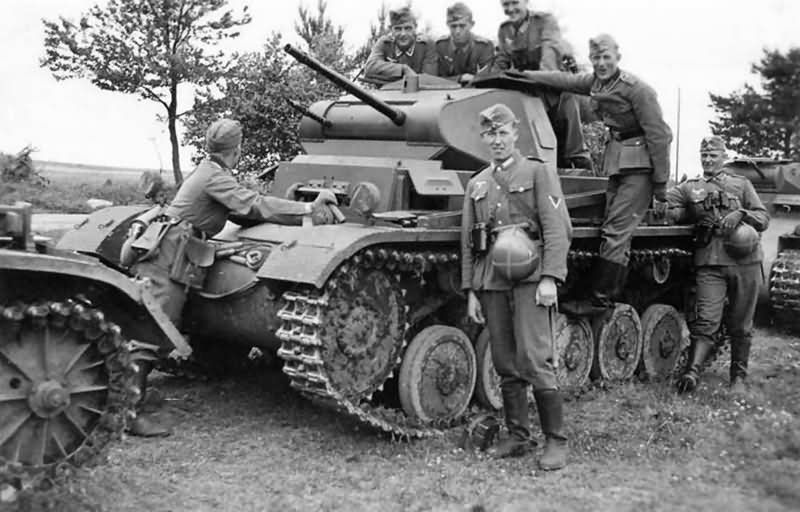
El Panzer II a light tank was developed in Germany in the years 1930, used in World War II. The name is an abbreviation of its official name in German Panzerkampfwagen II (armored fighting vehicle II model), abbreviated as PzKpfw II. The inventory designation German military vehicles for this tank was Sd.Kfz. 121. It was designed as a stopgap while other tanks were developed and played an important role in the early years of the conflict, during the campaigns in Poland and France. In late 1942 he retired from the battlefront, and production ceased tank 1943, but its chassis was used for other armored vehicles.
In 1934, delays in the design and manufacture of Panzer III y Panzer IV it became apparent. designs for a temporary replacement was sought from Krupp, MAN, Henschel y Daimler-Benz. The final design was based on the Panzer I, but with a larger turret riding an anti-tank cannon 20 mm. Production began in 1935, but it took another eighteen months until the first combat ready tank to surrender.
The Panzer II was the main battle tank in the German Panzer divisions at the beginning of the Battle of France, until it was replaced by the Panzer III and IV 1940/41. Later, the Panzer II was used effectively as recognition tank. It was in the German campaigns in Poland, France, Denmark, Norway, North Africa and Russia. After being removed from the front line, He was used on secondary lines and patrols.
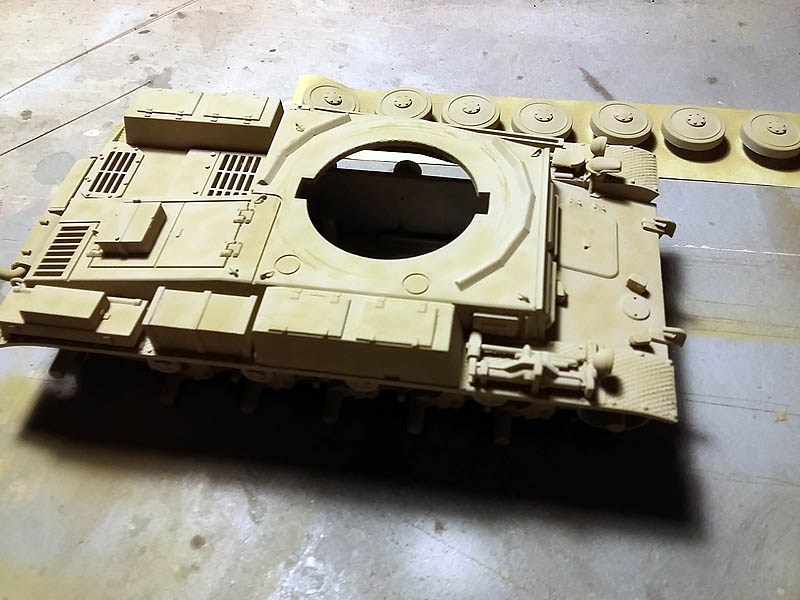
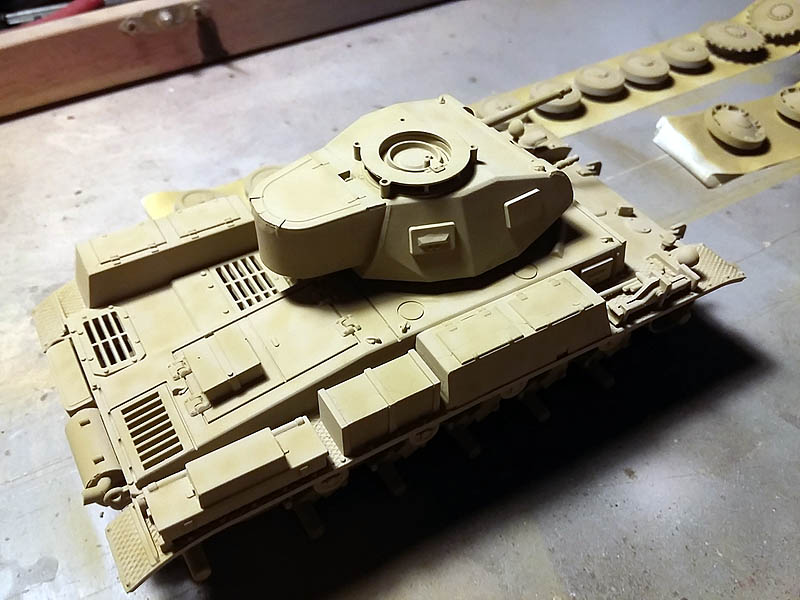
The mounting kit:
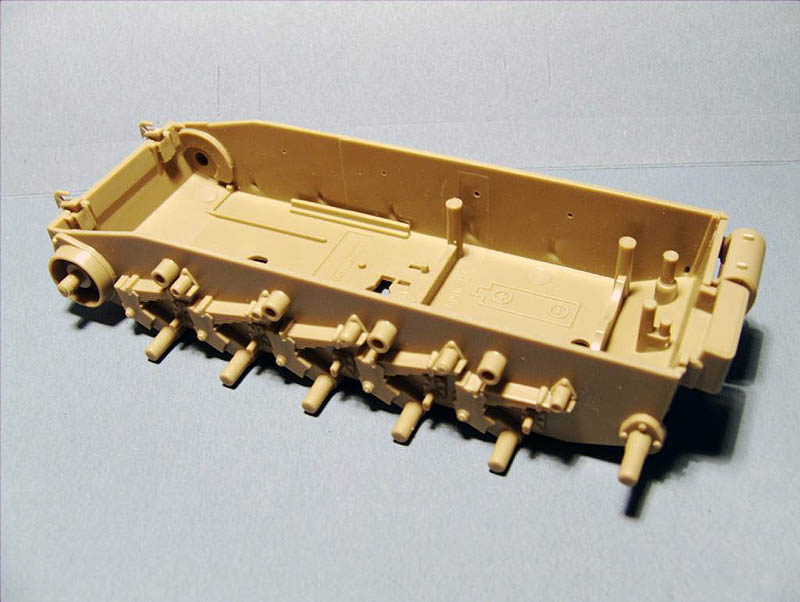
The kit as we can see does not have many small parts of the tank and is accompanied by several soldiers who will discard and I will focus only on the chariot, This kit takes the traction chains Rubber although saving assembly work link by link I prefer separate plastic by links as their final aesthetic is far better than rubber, but with a little skill and patience you can come to fruition with these rubber. Remember that there are other brands that makes modeling accessories such as chains running in more detail to these kits.
 I start with the assembly and after performing the bonding of the turret and some elements I stand chassis to remove the holes having the carriage base where you can add elements to motorize these kits Tamiya.
 For this I use pieces of Evergreen and Tamiya putty putty.
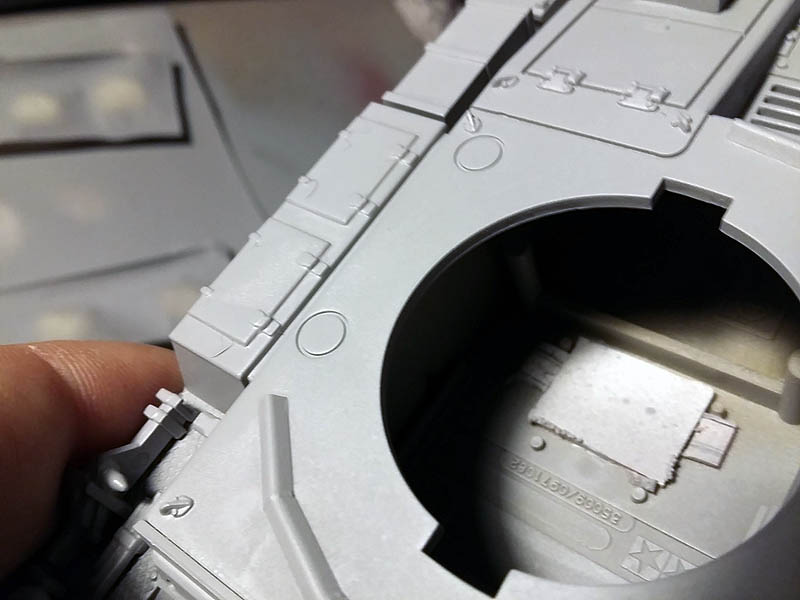
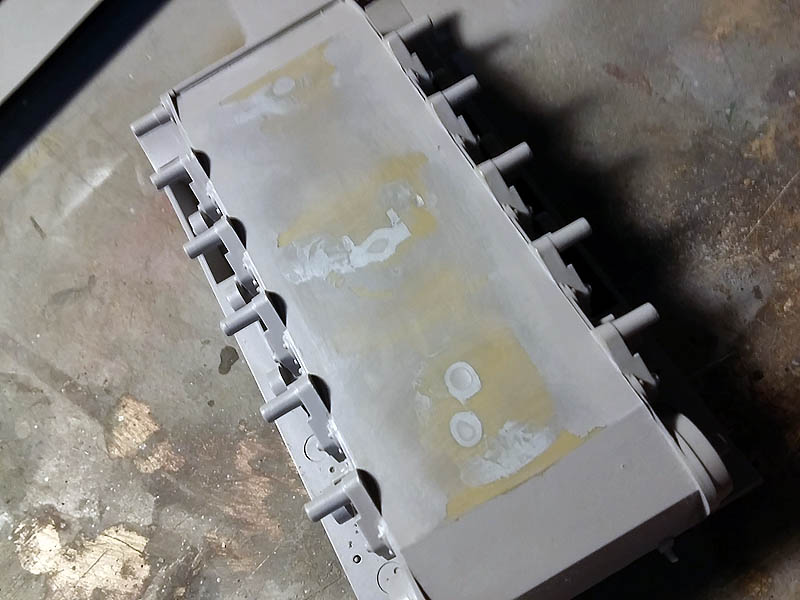
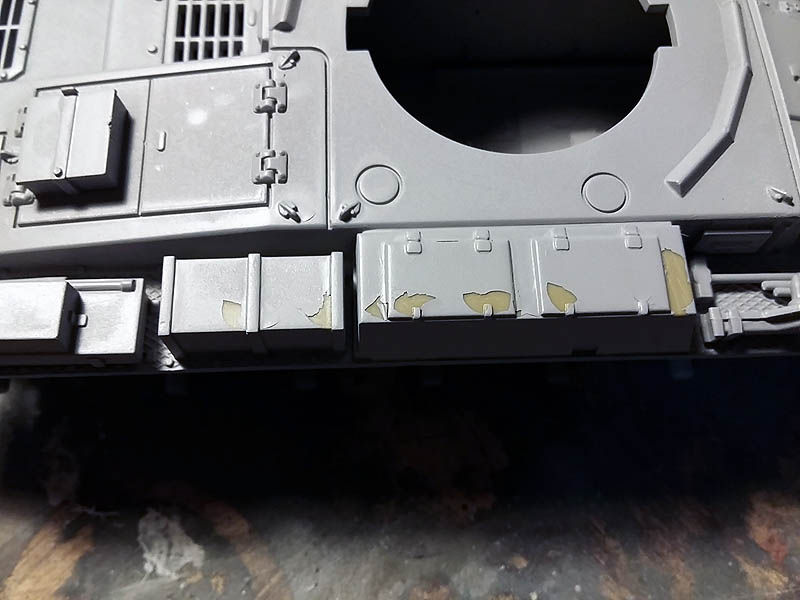
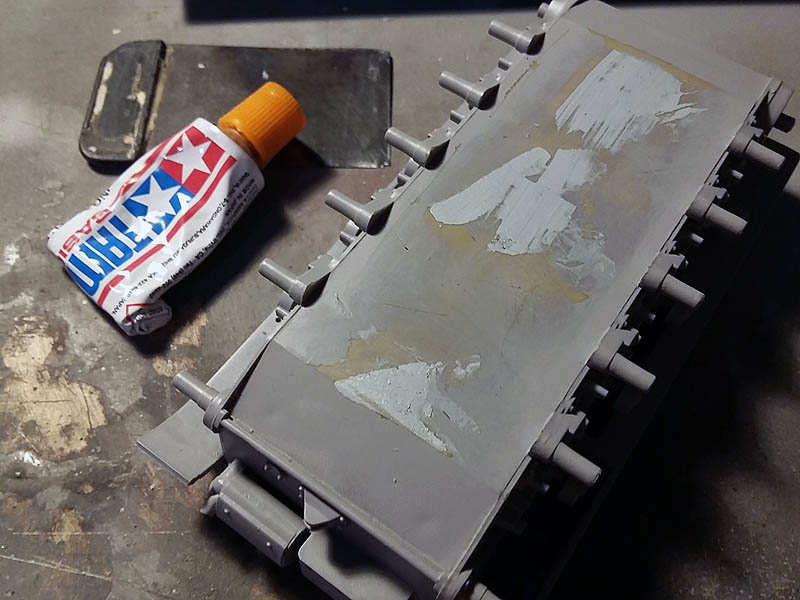 When drying putty density tends to lose so I have to give multiple passes, after each process of adding more putty and drying must be sanded to make the surface smooth.
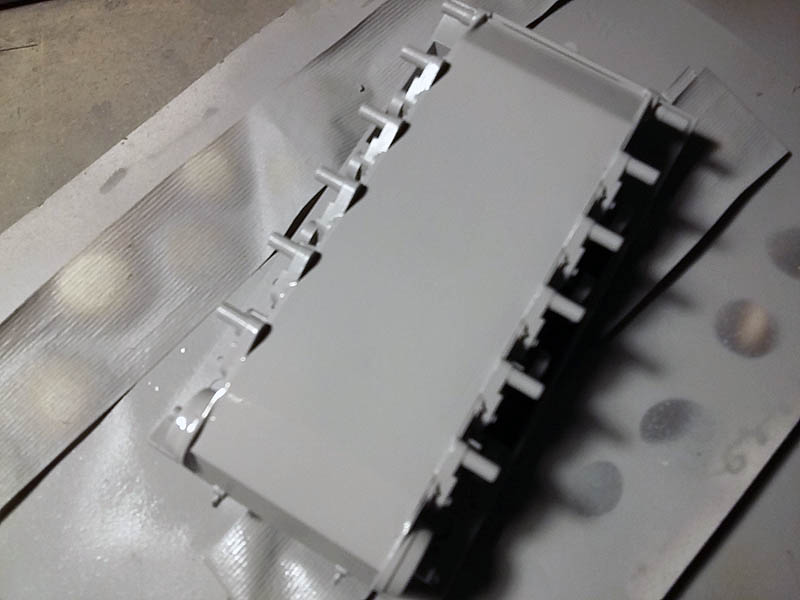
 Once you sanded and everything in place step by painting, as always the first layer, the gray primer Spray brand Vallejo.
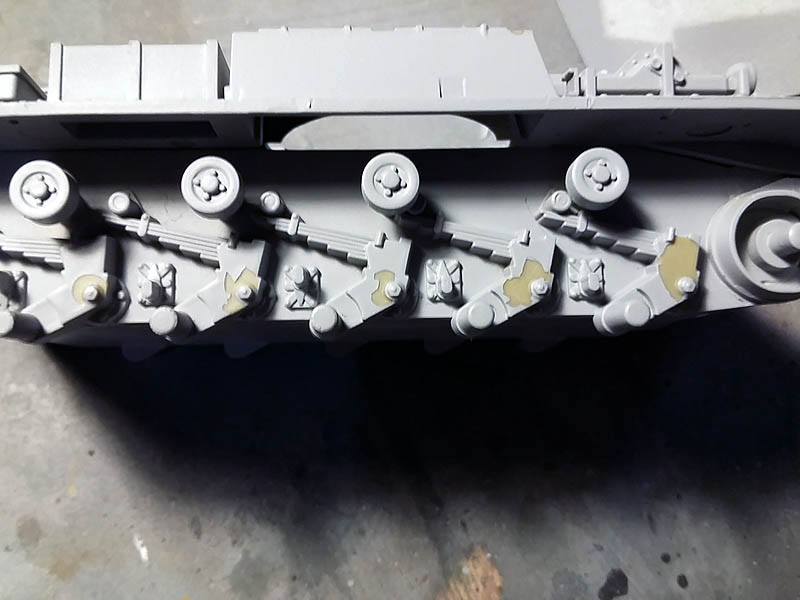
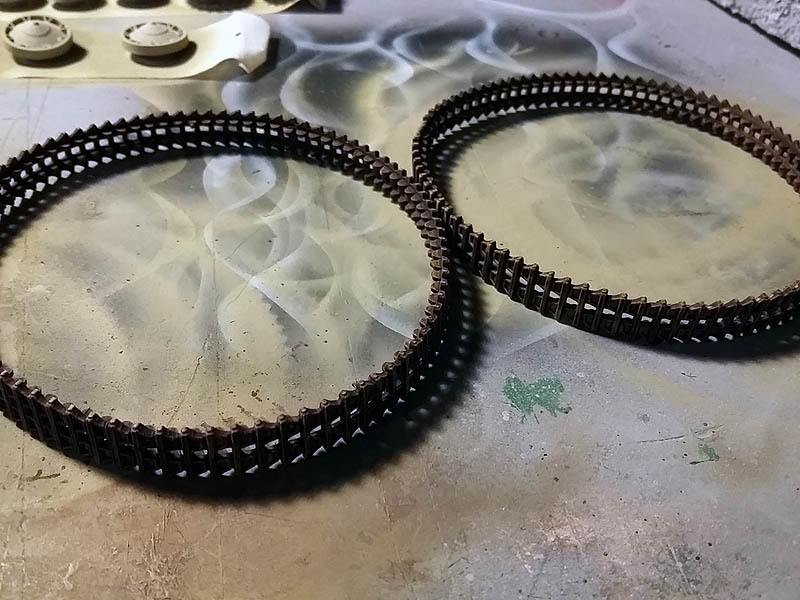
Print chains shooting rubber.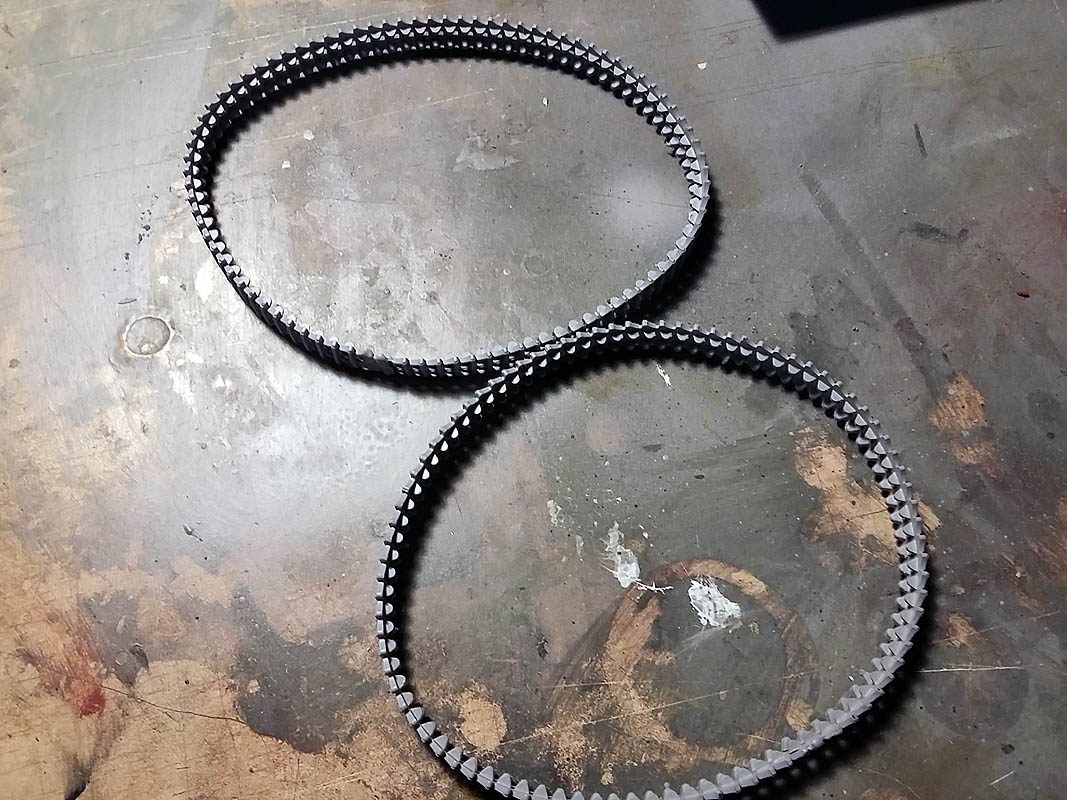
The turret.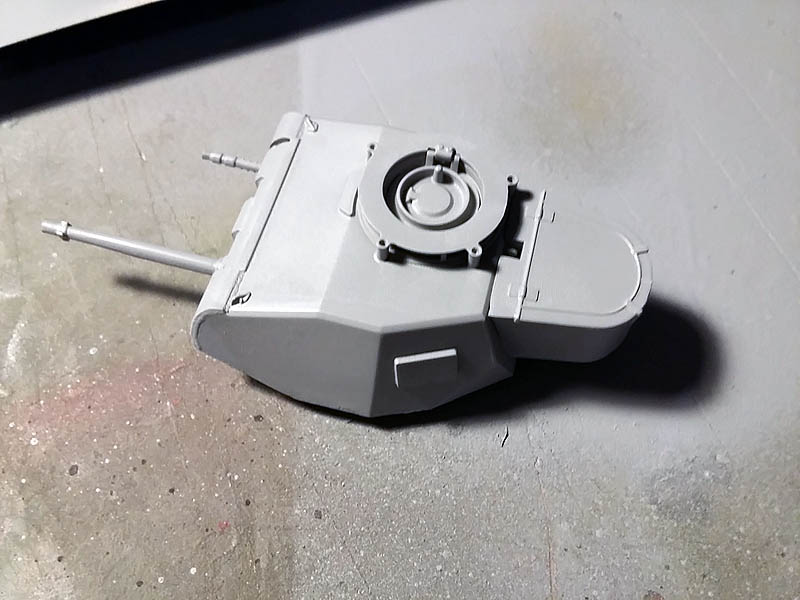
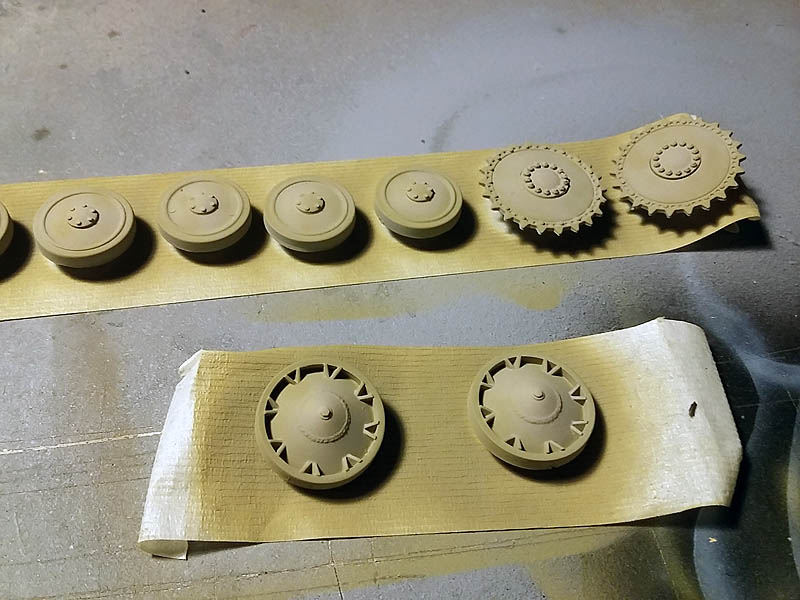
 The wheels.
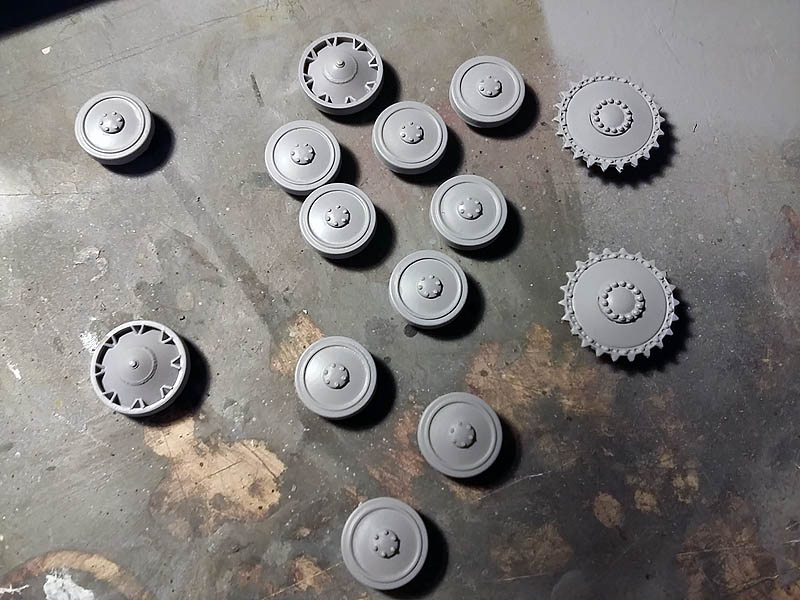 And surprise ... is not the first time it happens with this boat primer jump me on some sides of the kit, the truth this is a lottery, I will not re-sanded and primed, lijo descorches and step directly to the base paint, on the other kit that occurred to me much the same for returning clean and print again skip the primer.
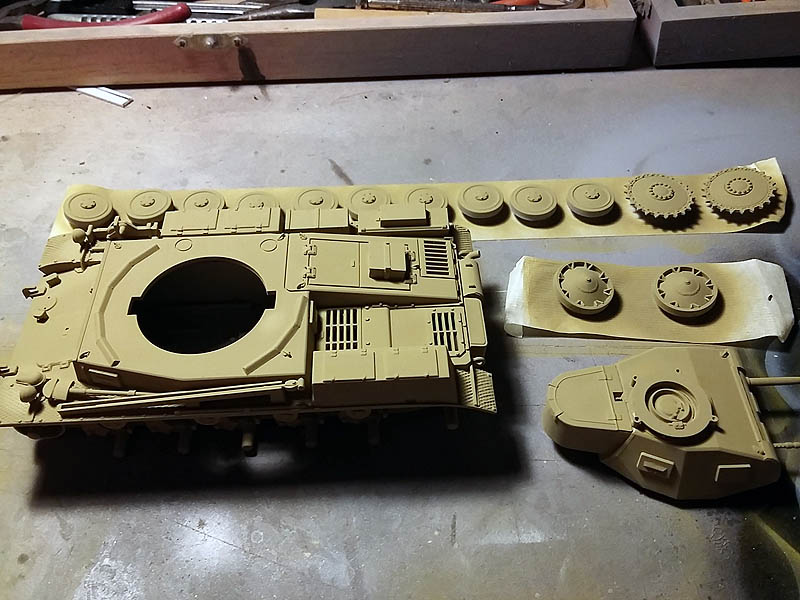
 After sanding and fixed the way to the first coat of primer mess, I use this model to dark yellow Tamiya XF-60.
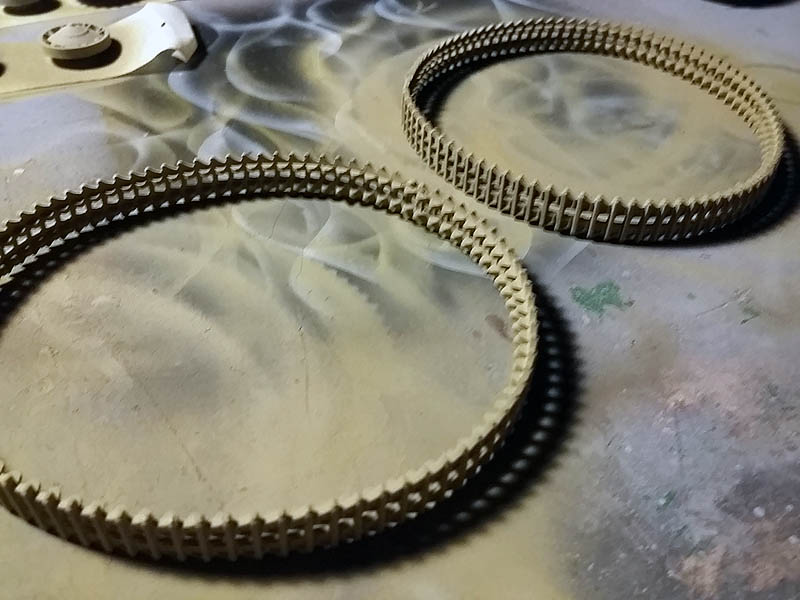
 Still with chains undercarriage, apply the same color base that the chariot.
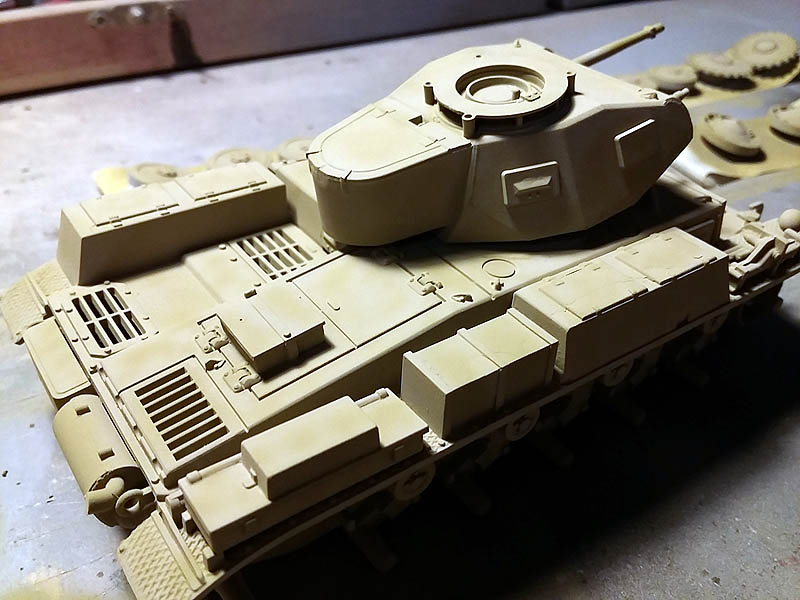
 Once dry apply a few colored lights Buff Tamiya XF-57 throughout the panzer II and its wheels.
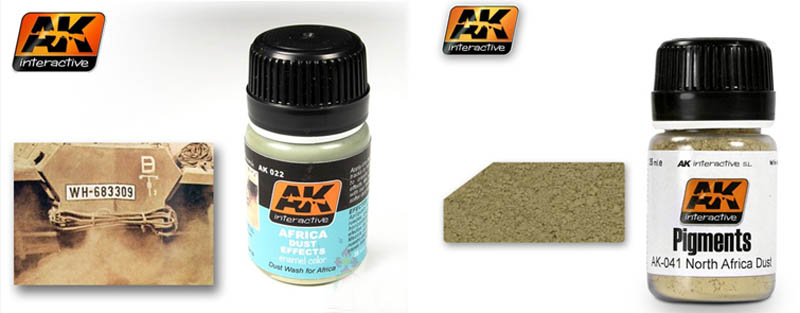
 Before turning to painting and the decals applied a wash chains based shooting to give effect brown rust before aging, for this I use a wash chains AK-Interactive with reference "AK-083"
 The next step is to paint all objects as shovel, tires idler wheels etc..
Before applying the decals I spray all the car where they need to be bonded with glossy varnish Tamiya X-22.
Once dry, the paint job step to adhere the decals with the help of special liquid for this task.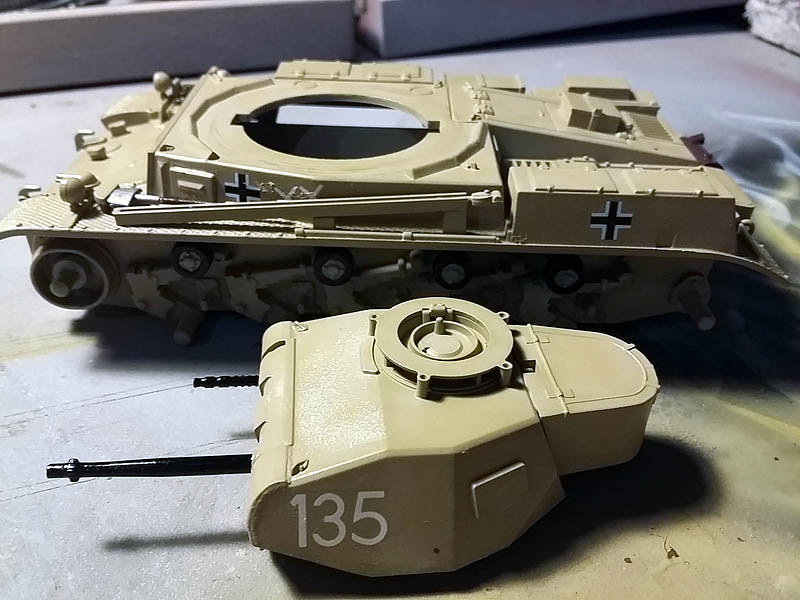 A few hours later we protect the decals with bright paint the same as used previously.
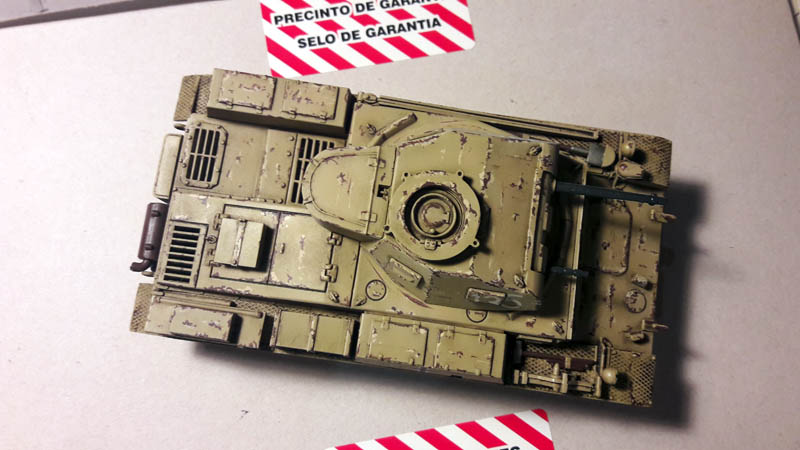
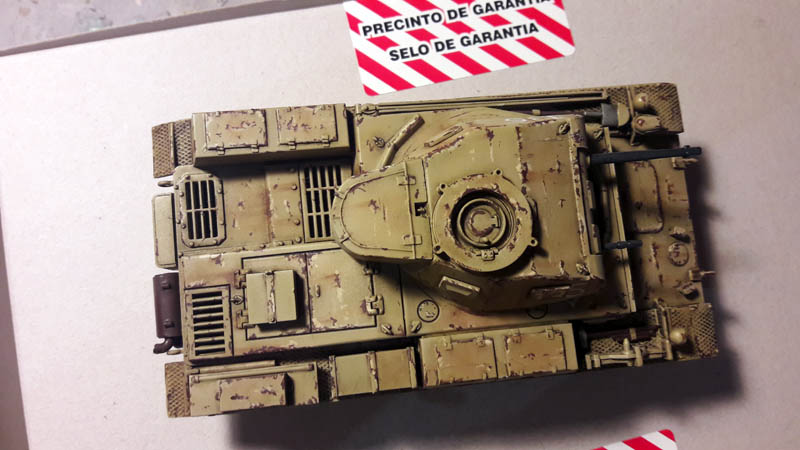
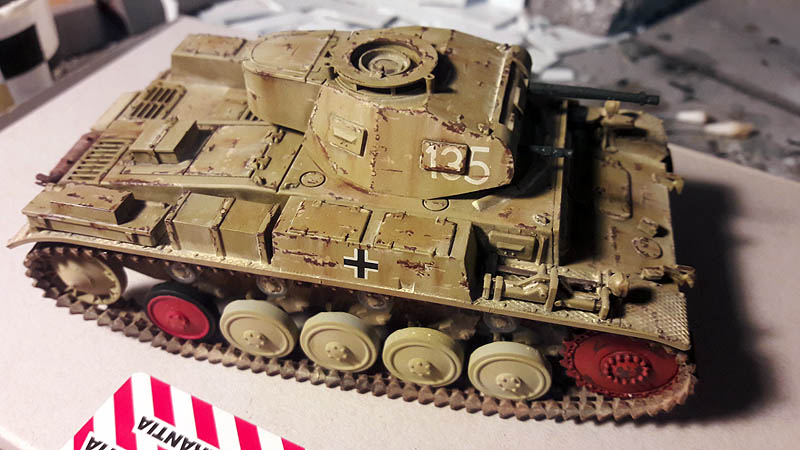
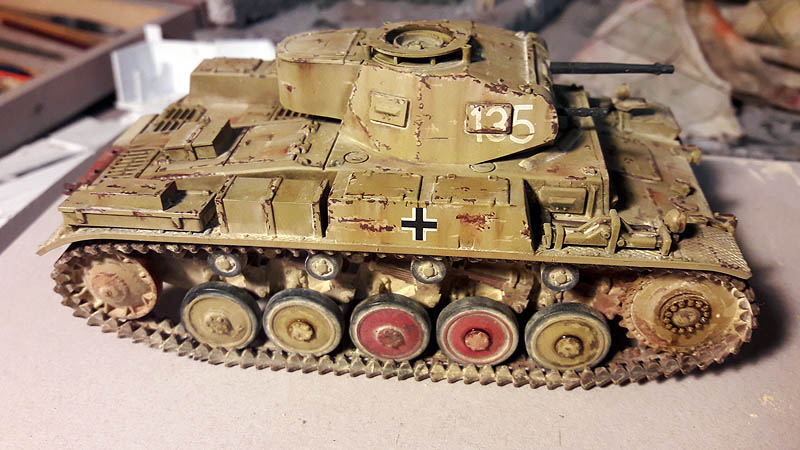
It's time to start the vehicle age, this will depend used for purposes, in my case it will be an abandoned car in combat so their level of wear should be moderate high.
I start with a fine brush and a reddish brown and add the descorches in areas where often caused by friction, opening doors or trafficking.
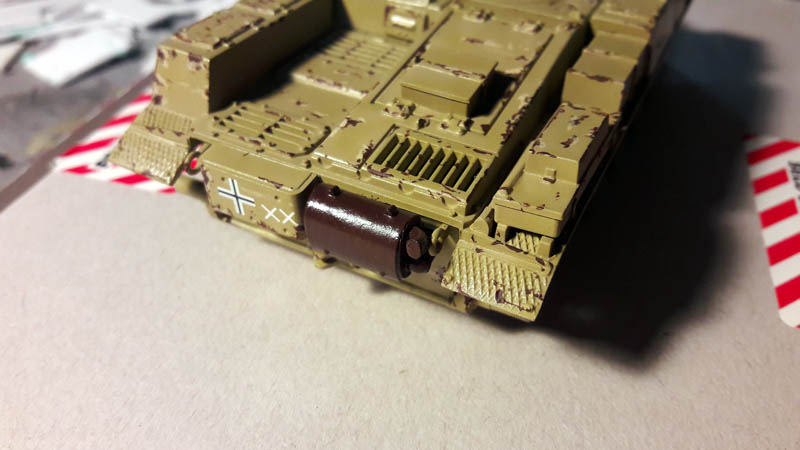
To give a little more realism to those descorches I add other base color mixed with a little white to clarify and apply near brown.
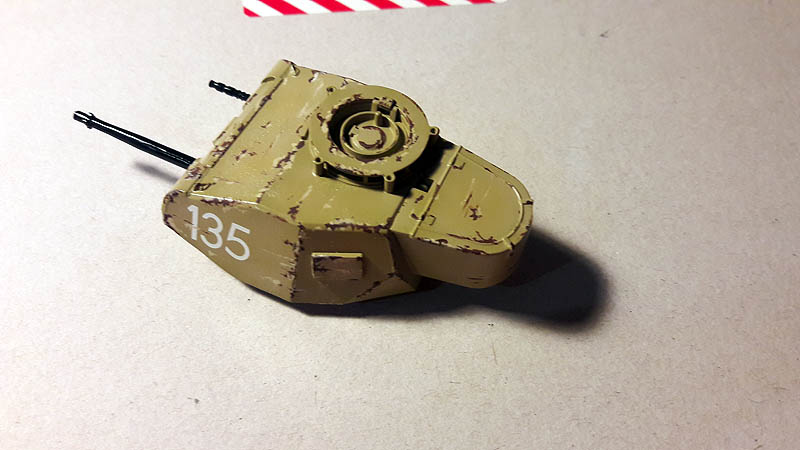
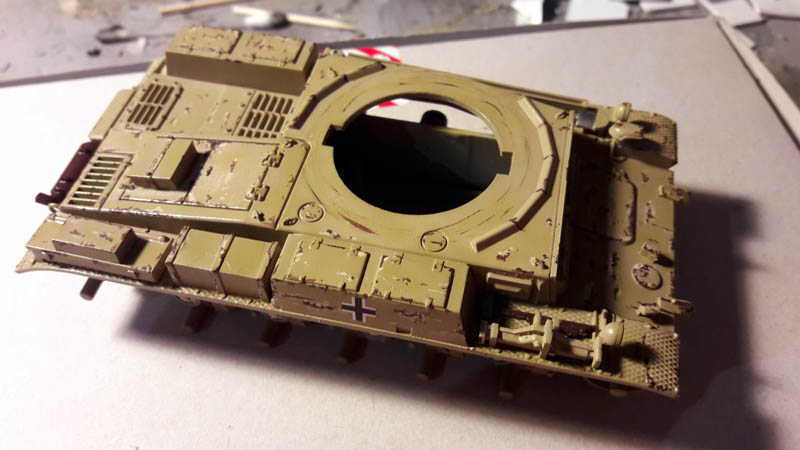
 Once the process is finished the descorches I apply a wash AK Interactive For vehicles with desert camouflage, normally it applied to the recesses, but it would apply to the entire vehicle and unifies all shades me and me together and crannies highlights at the same time.
Let dry several hours and then apply a coat of matte varnish transparent acrylic whole vehicle type to protect all work and helps me then to apply paint or enamel washes and did not spoil the previous work.
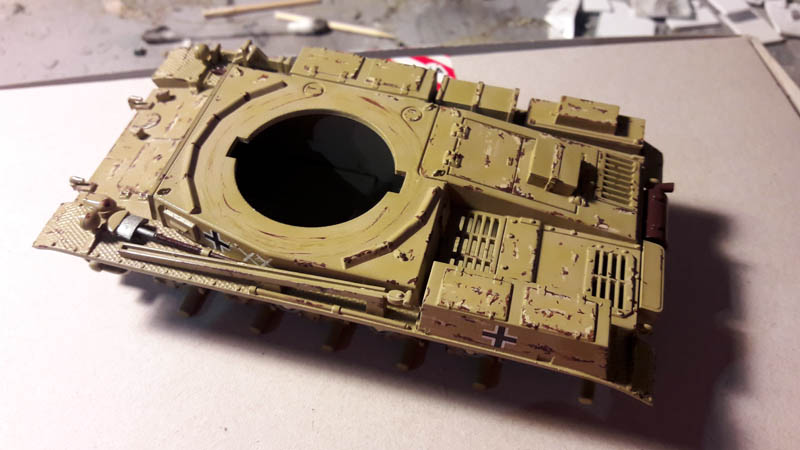
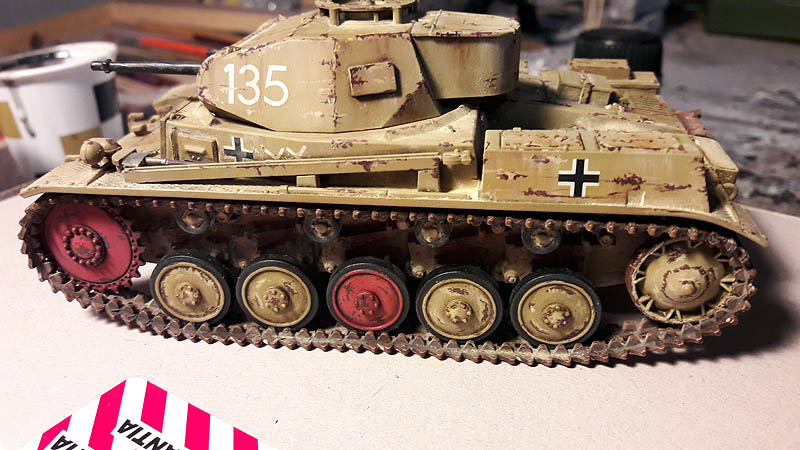
Once dry the paint layer matte start with oxide chorretones, for this I use a product AK Interactive called "Streaking grime".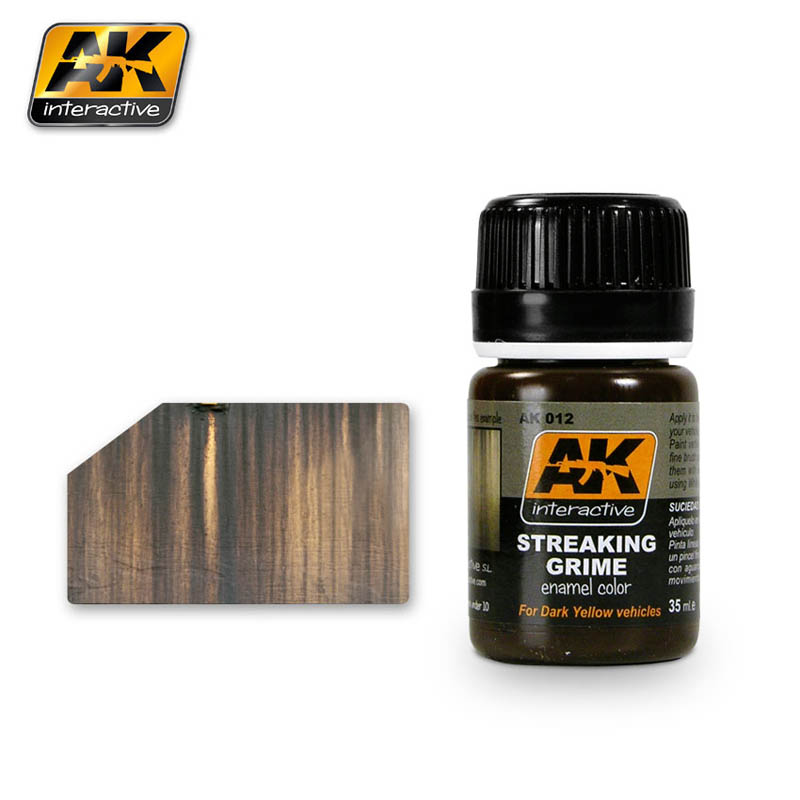
I apply it with a fine brush along a line from top to bottom in the parts where I want to apply the chorretones, as in the descorches and very worn panels.
Then let dry a few minutes with a flat brush moistened with thinner same brand, I blurred the line using the same movement up and down and the result is as follows.
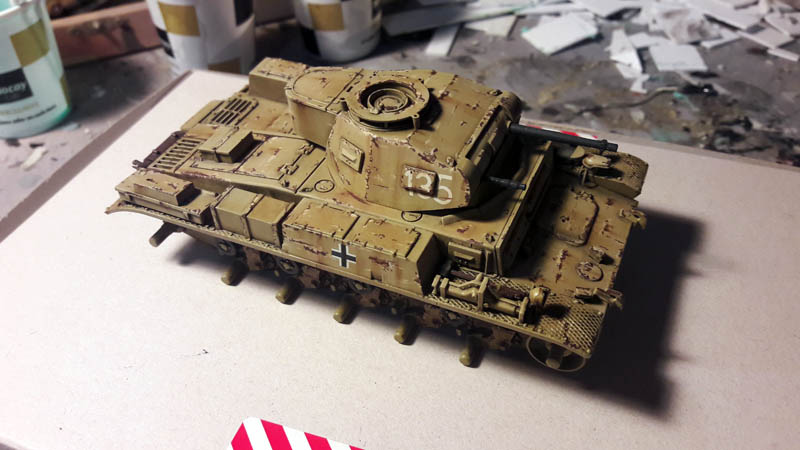
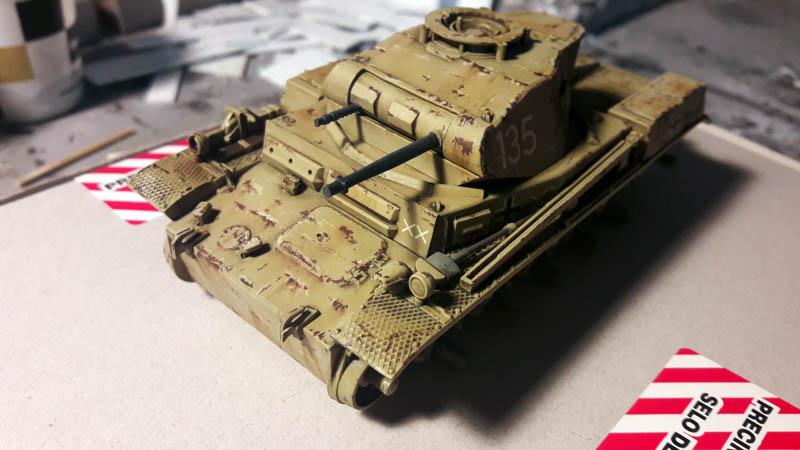
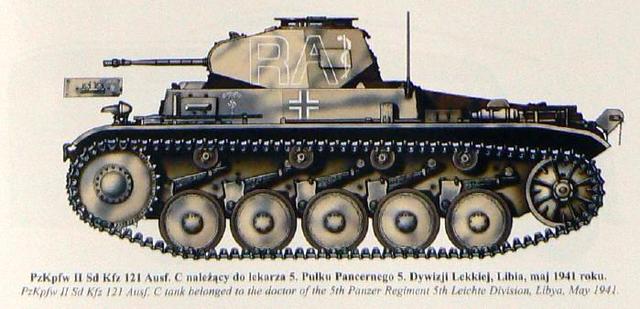
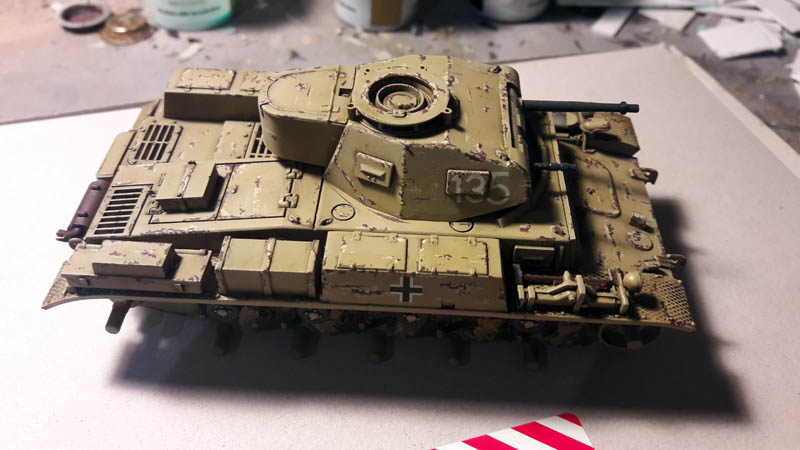
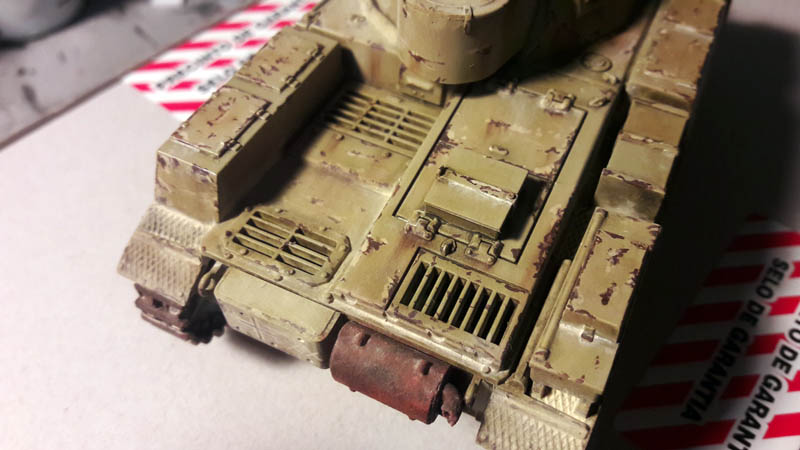
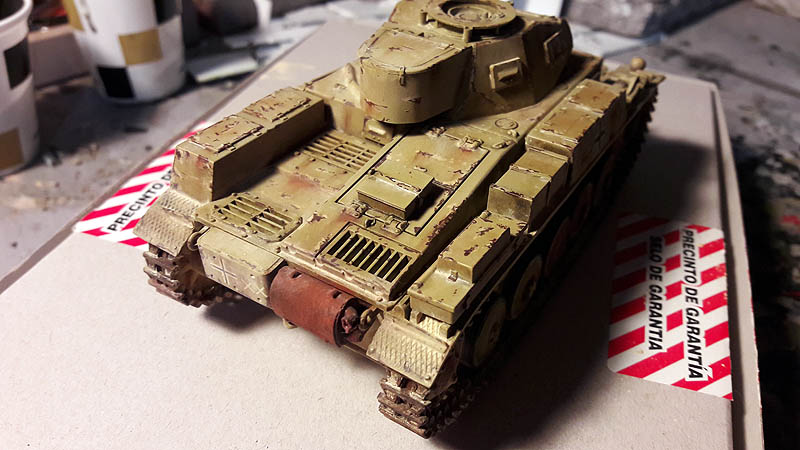
My idea for this panzer is added to a diorama in the desert, abandoned and homeless in countless arenas, dust and sun, so I need a little more dirt and it will apply "African Dust", there are two formats dry (Pigmento North Africa dust) and wet (Lavado Africa dust effects).
I will use the two, I use a first applying with a fine brush in the crevices where dust accumulates washed and left to dry, once dry with a damp brush or remove excess difumino out forming a gradient from outside to inside.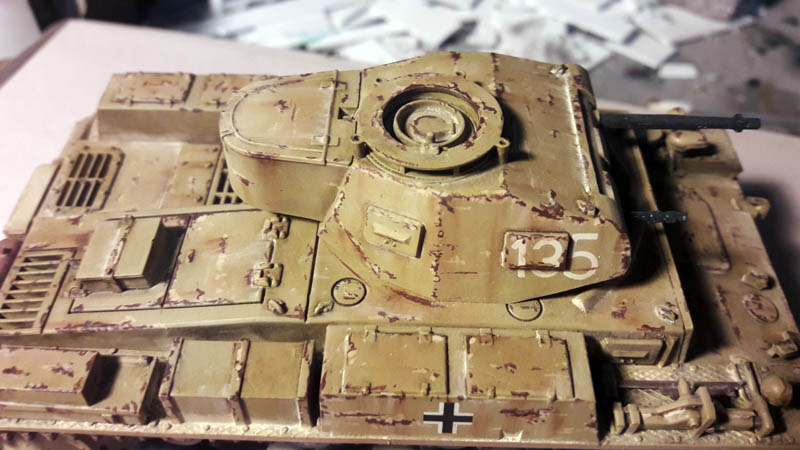
And once everything step dry powder with the pigment, same tone, the most exposed nooks and some flat surfaces like the front fenders, side and rear and the top of the turret, surface of the engine and the front and rear plates, which is where most can accumulate said powder.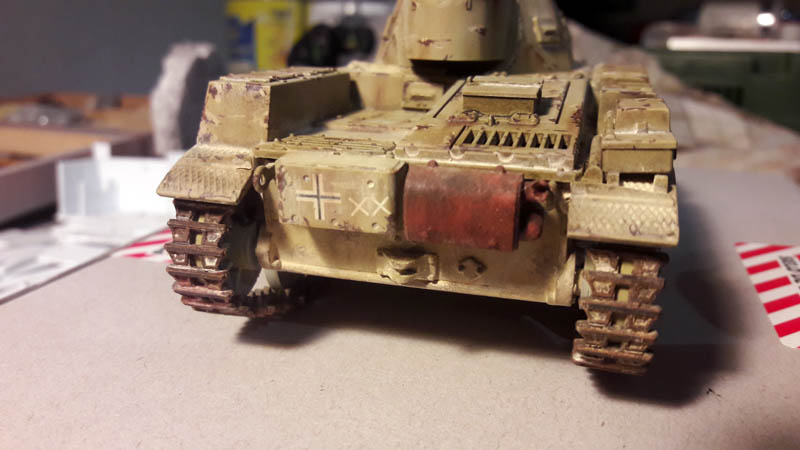
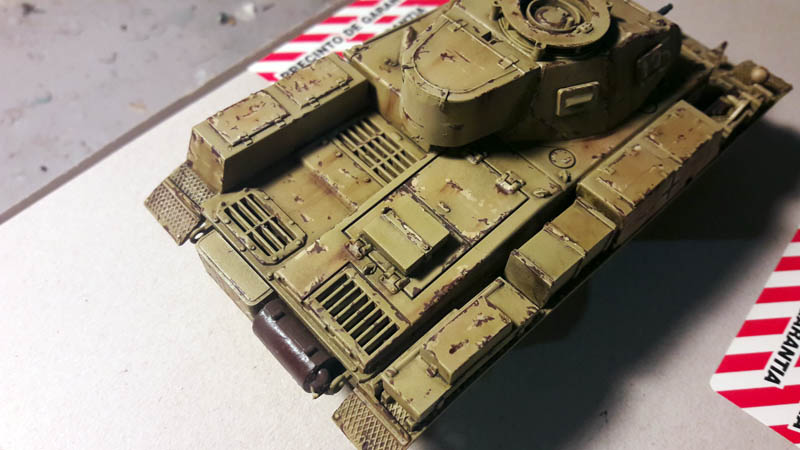
Now is the time to work the traction chains, for them I will use a combination of pigments, North Afrika dust, European dust y Medium Rust, I first applied with a brush pigment North Africa all the surface of the chain, once all covered with a smaller brush'm adding areas with pigment dust European and by the end the Medium rust applied to other areas where I want to show rust, then with a stick ear hygiene dampened with mineral spirits or remove the pigment there on the ground nips chains then cover them with graphite.

Ending with tractor chains, passage to the exhaust pipe which paint a reddish brown as the base and which apply a brown wash as that applied to the oxide chains and chorretones, I apligo once dry pigments, Light and medium accompanied by black rust.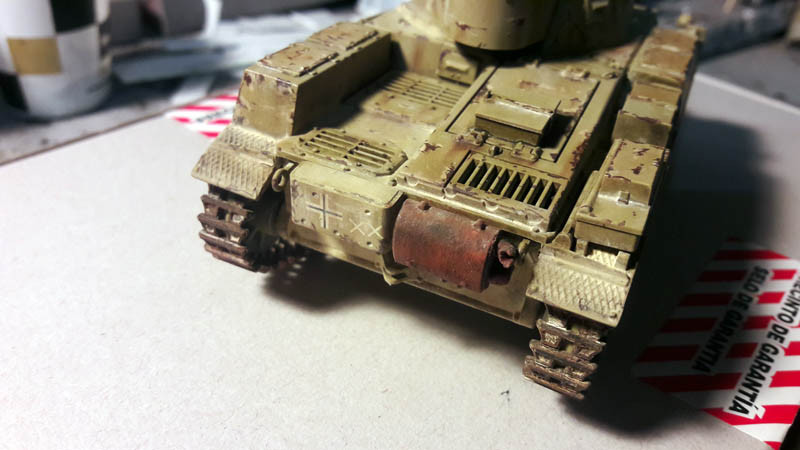
And I apply a little pigment North Africa dust on top to give effect accumulated dirt.
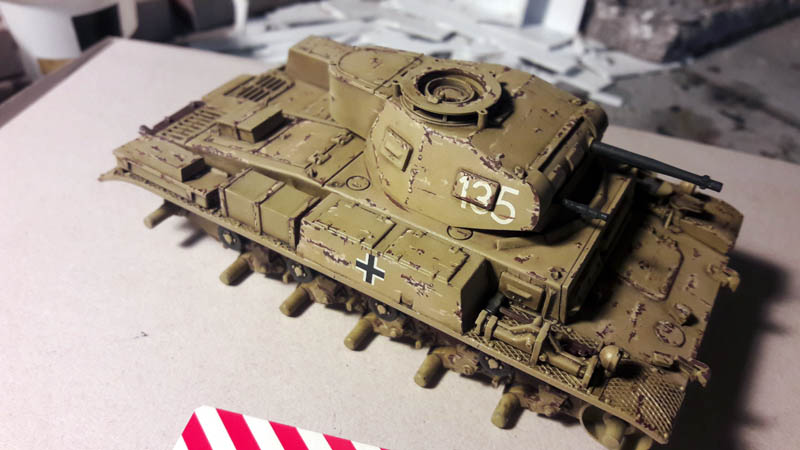
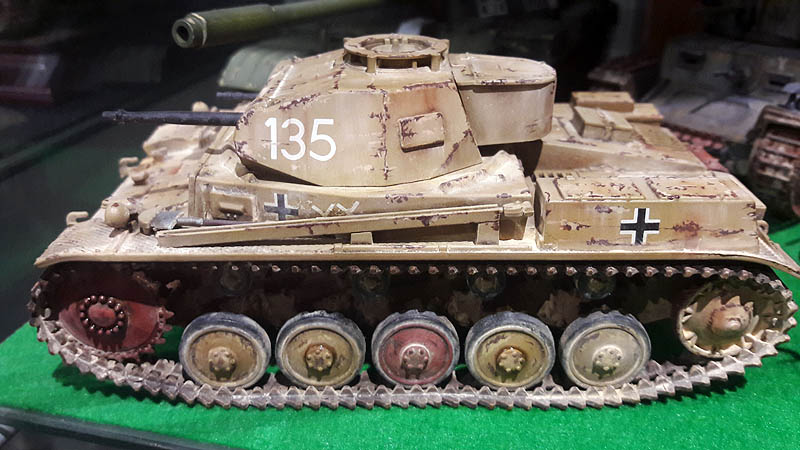
Siguiente paso, the driving wheels, to break a little color scheme I will paint one of the driving wheels red simulating red paint anti rust, as if for lack of spare parts and urgency they had not been able to paint, so I remove a bit monotonous scheme that gives the African camouflage, before moving amount mainly to see the result. 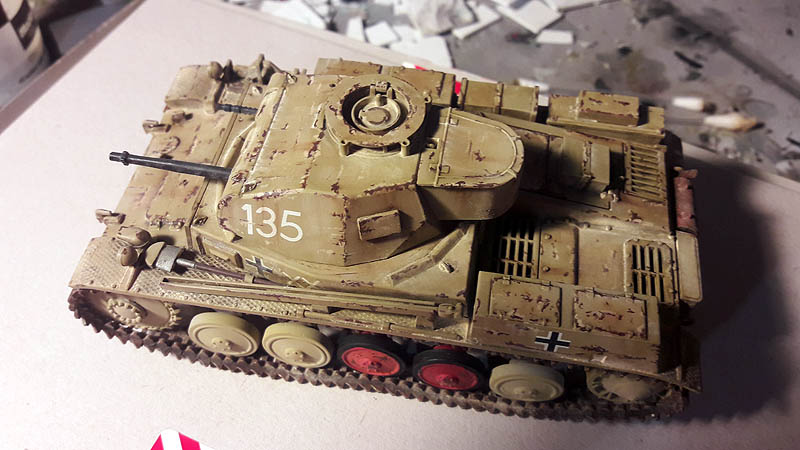
Step to paint the rubber wheels and matte black descorches using the same colors that I have applied in the panzer.

I then apply a coat of varnish and let dry and then apply the washing that I used in the chassis and highlight the ins and outs followed with another wash a darker color applied with a fine brush in the recesses of the rough.
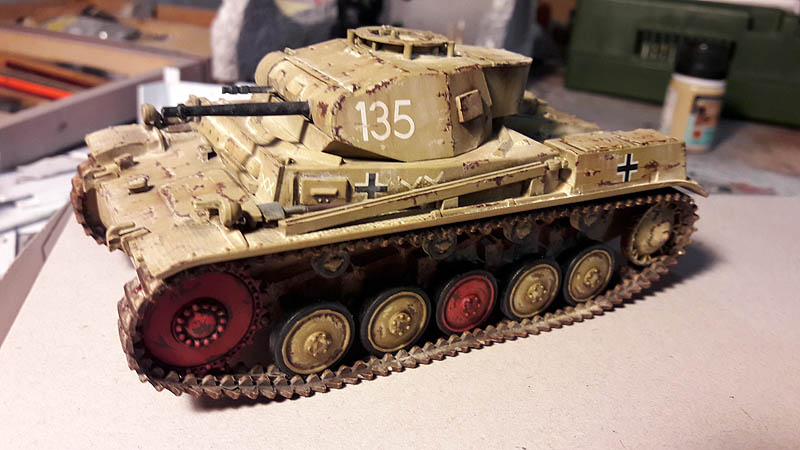
When everything is dry, step applying pigments, Afrika dust effect y Medium rust, just as in the panzer, removed with a brush or swab toilet ear sometimes moistened with aguarrás O "White Spirit"AK-Interactive excess.
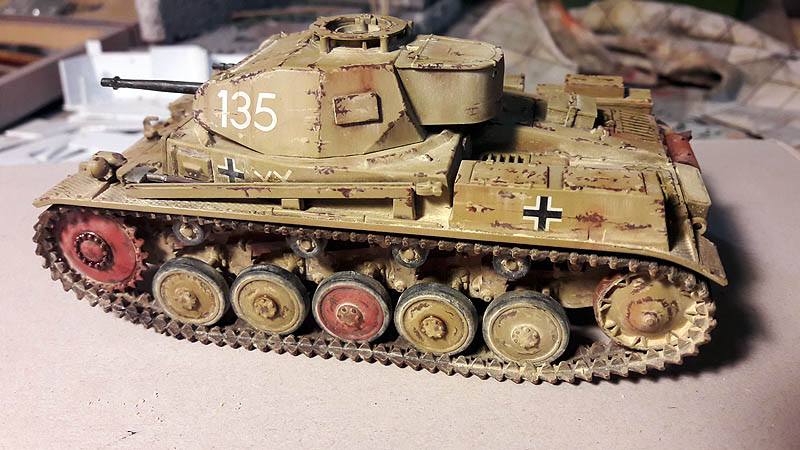
For the finishing touch I use a product AK-Interactive called "Engine Oil".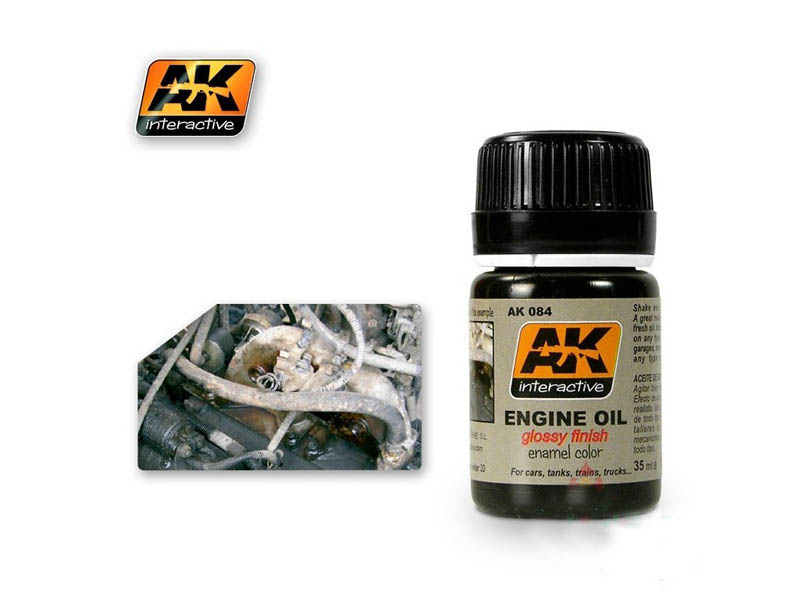
I apply a few drops of "Engine oil" effect bushings shafts some wheels giving effect oil loss.
With this I end, later once the ground end creare the diorama with this and other vehicles, so I will end this project.
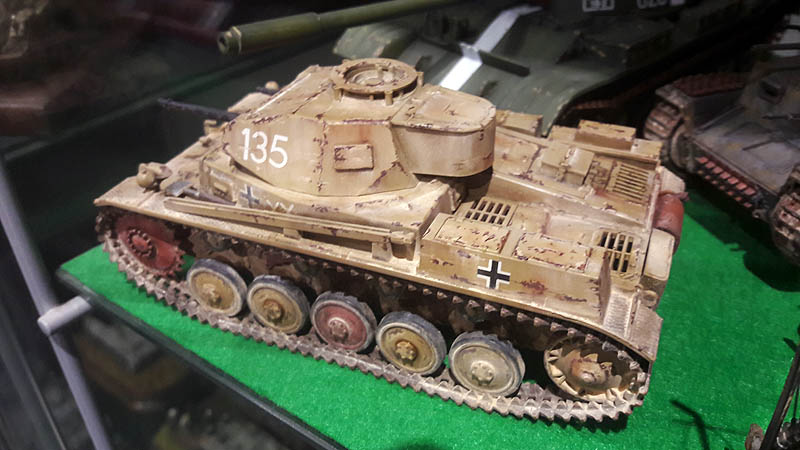
PROYECTO TERMINADO
Autor Armand C.M.