SAS British Special Air Service Jeep Tamiya 1:35 – Modeling
Thinking about making a desert diorama I made several purchases that consist of two Tamiya kit, old molds of two legendary vehicles WWII a jeep americano y un Panzer II, the last I'll leave it for later and focus on the Jeep, in this case the mythical willys American English version of the British Special Air Service (Special Air Service) the SAS, a command that operated in the desert making surprise attacks and sabotage in German bases and airfields. Este kit es a scale 1:35 and although old molds Tamiya has very good quality and now priced fairly low.
El kit en cuestión:
 A little history about SAS (Special Air Service):
The Jeep:
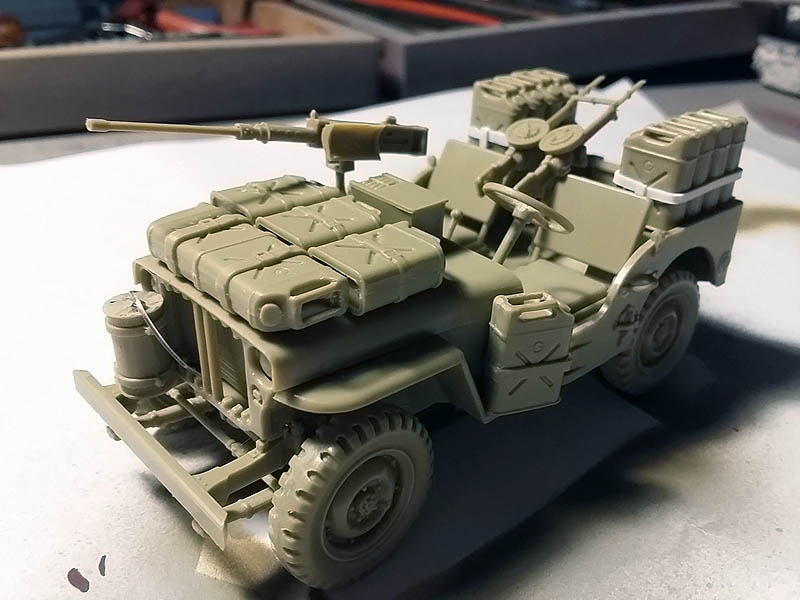
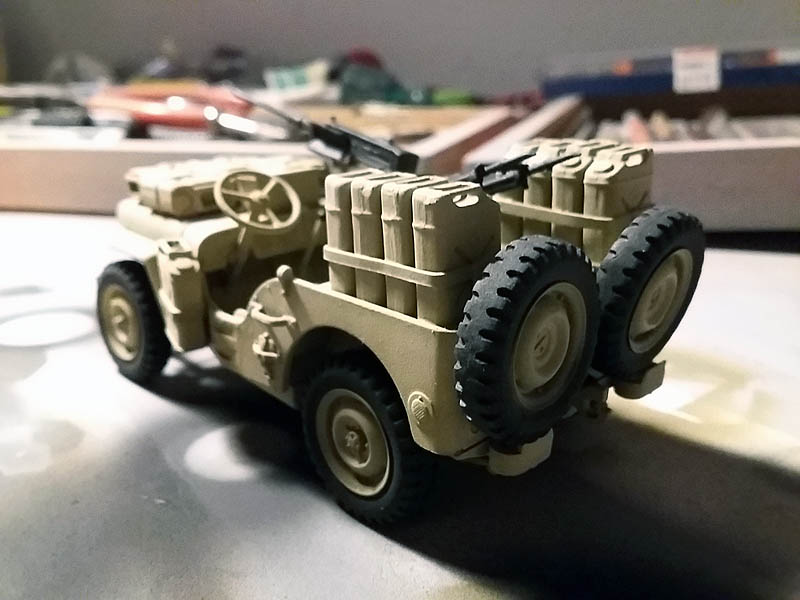
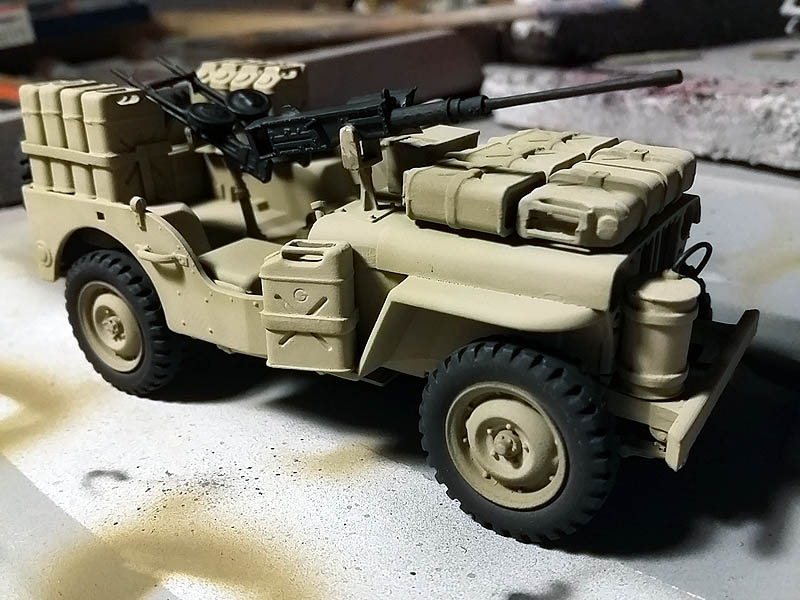
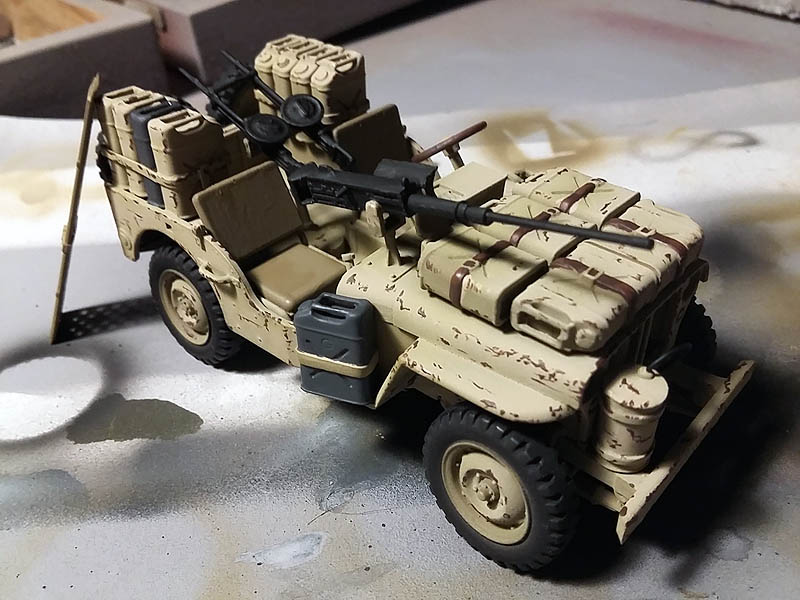
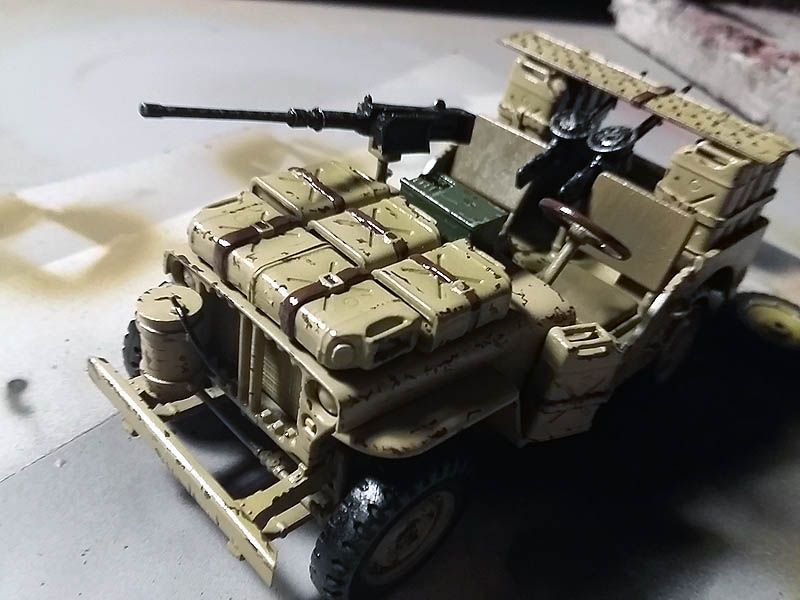
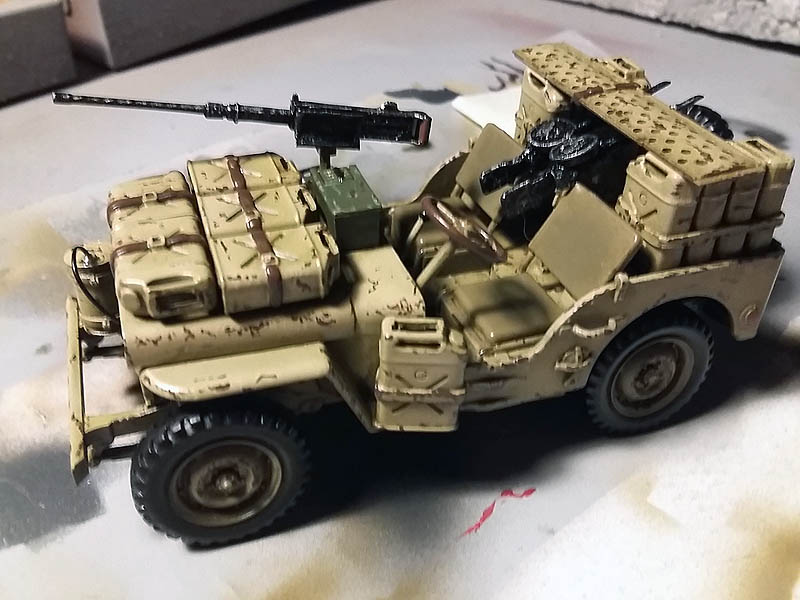
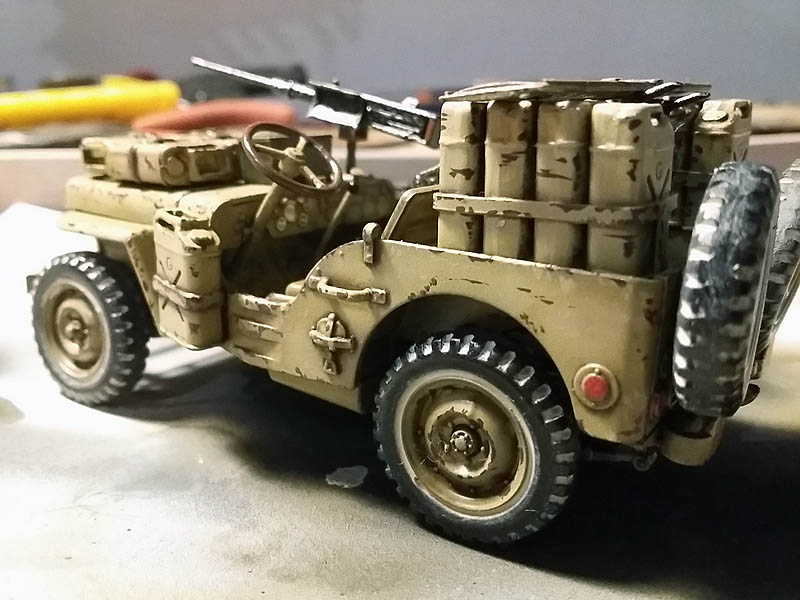
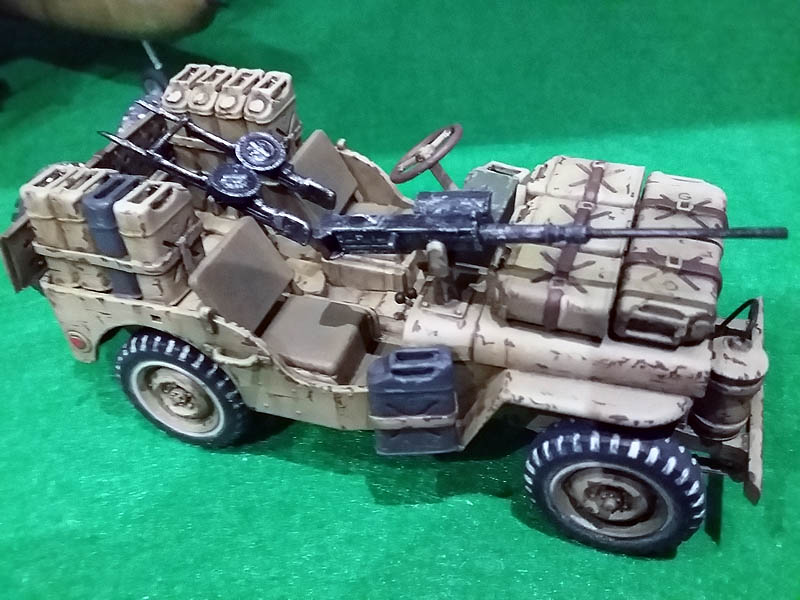
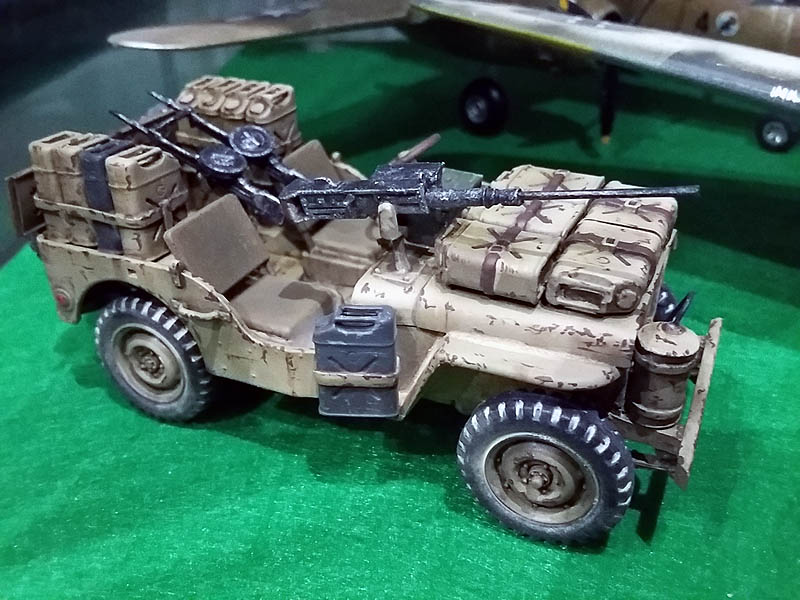
The Jeep had undergone a major transformation with respect to its original configuration and were heavily armed with 3 from 5 guns, further, large number of cans of water and gasoline were coupled, adding all sorts of survival equipment, ammunition, sleeping bags, etc.
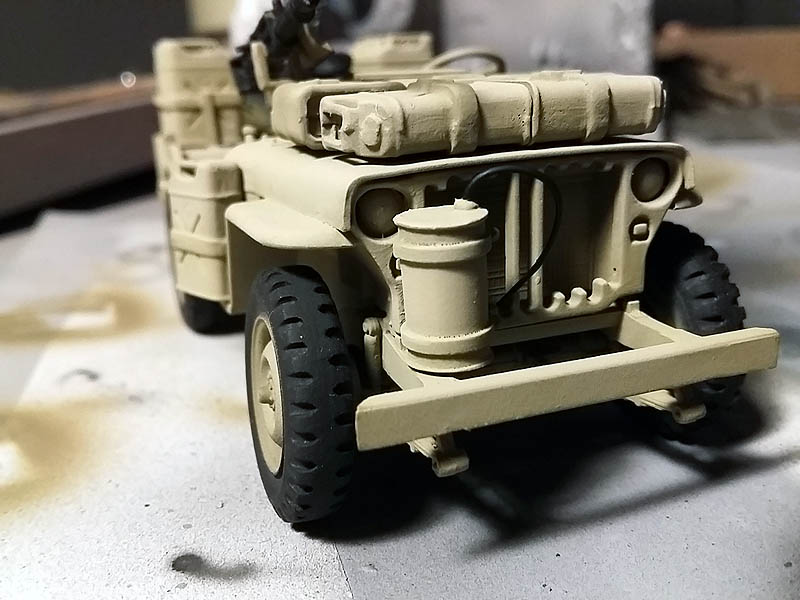
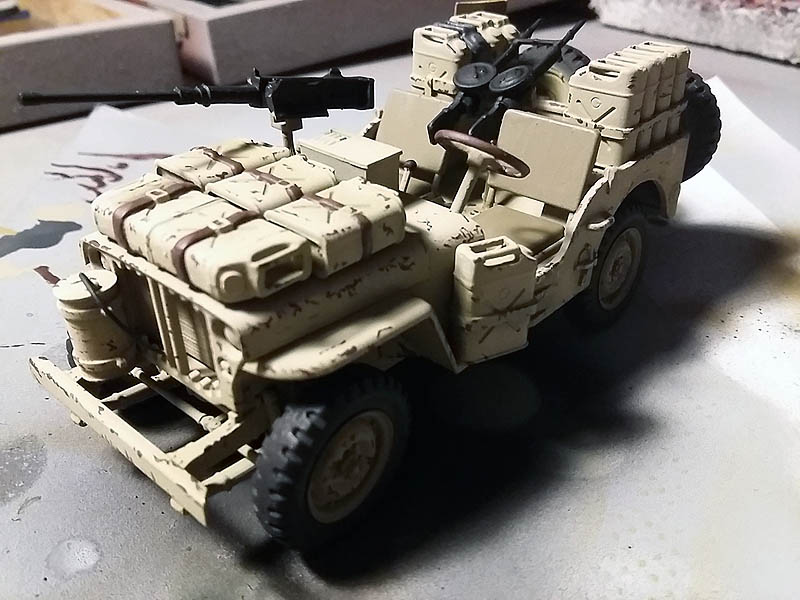
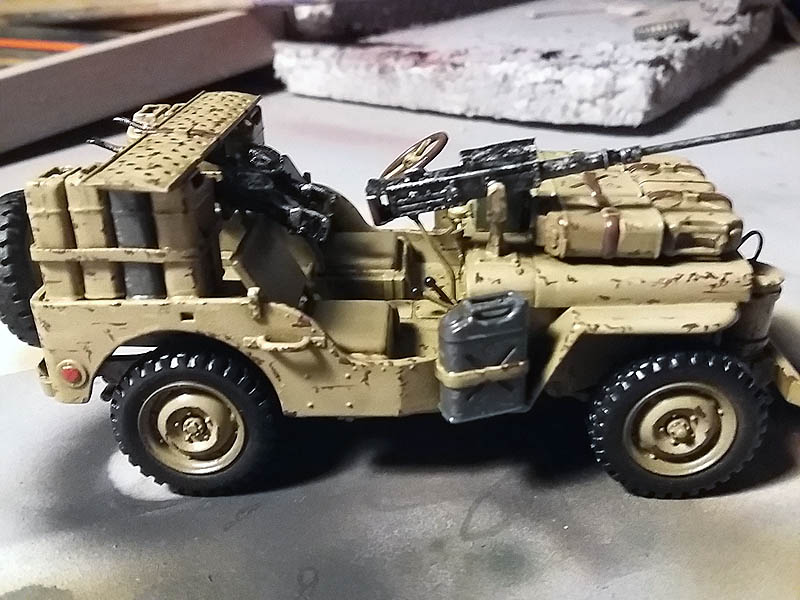
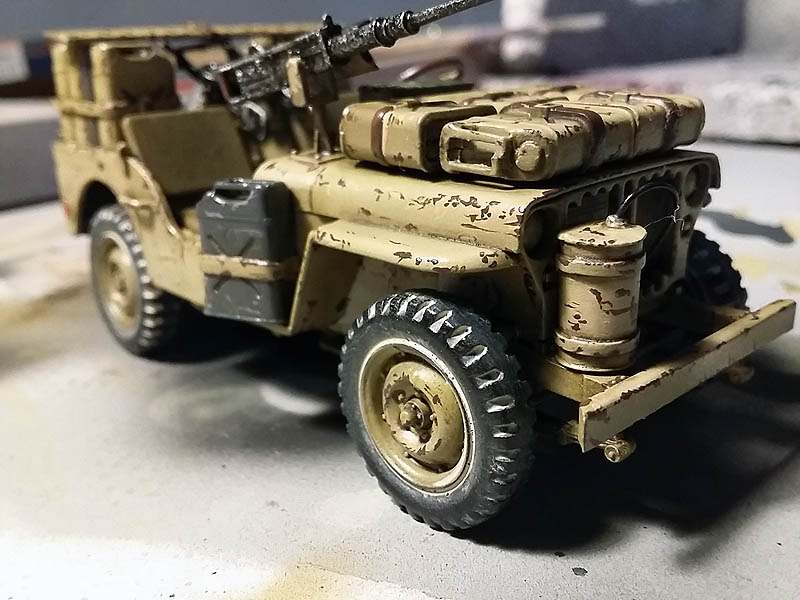
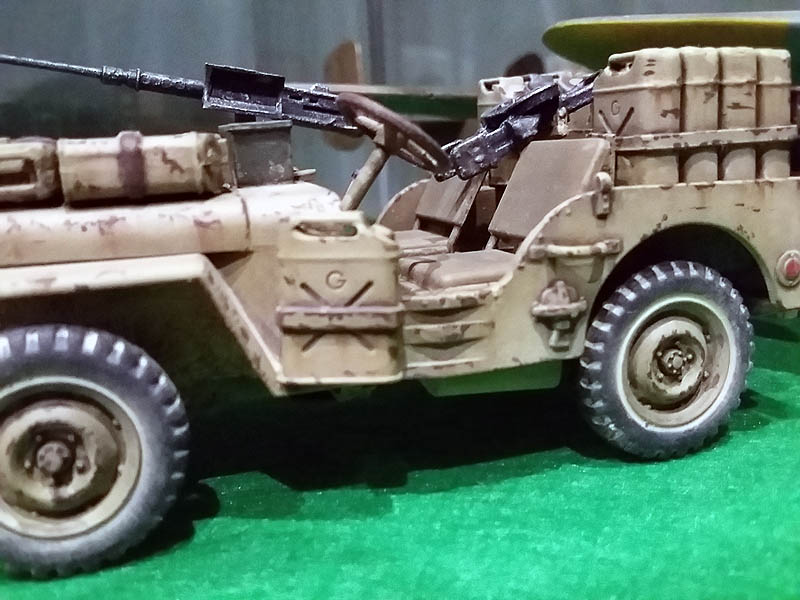
The water was very precious in the desert. If the water-cooled engine is overheated, The jeep stopped and the valuable radiator water would evaporate. It was very difficult to get water to the radiator. So they cut the front grille, under the bars, to facilitate air intake and cooling more effective. At the front of the grid placed a cylindrical can, connected to the radiator through a pipe. Thus they are avoiding unnecessary waste of water. In the can there was always a little water, radiator water boiled and evaporated, He passed through the tube into the can, there is cooled and returned to the radiator. This instrument was called a condenser.
A protector is also placed on the carburetor to keep out the sand in the engine. The windshield is not removed to reflect the sun.
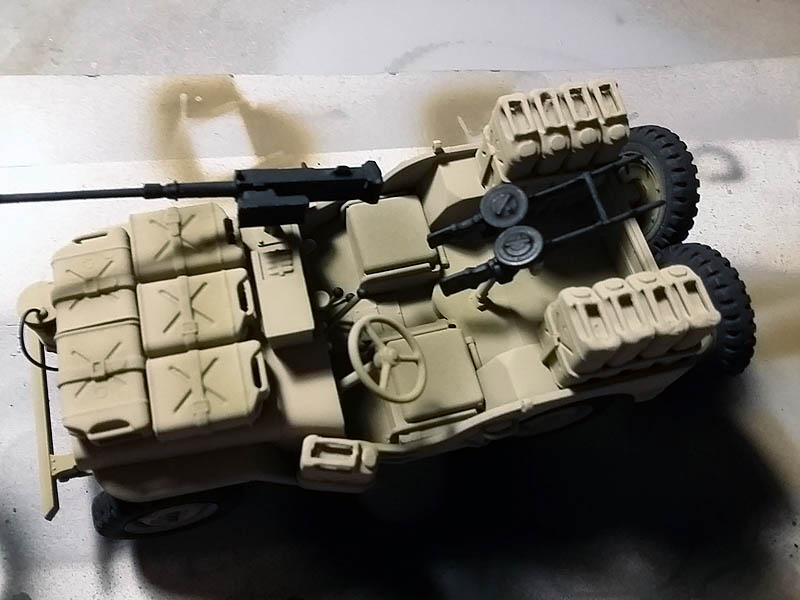
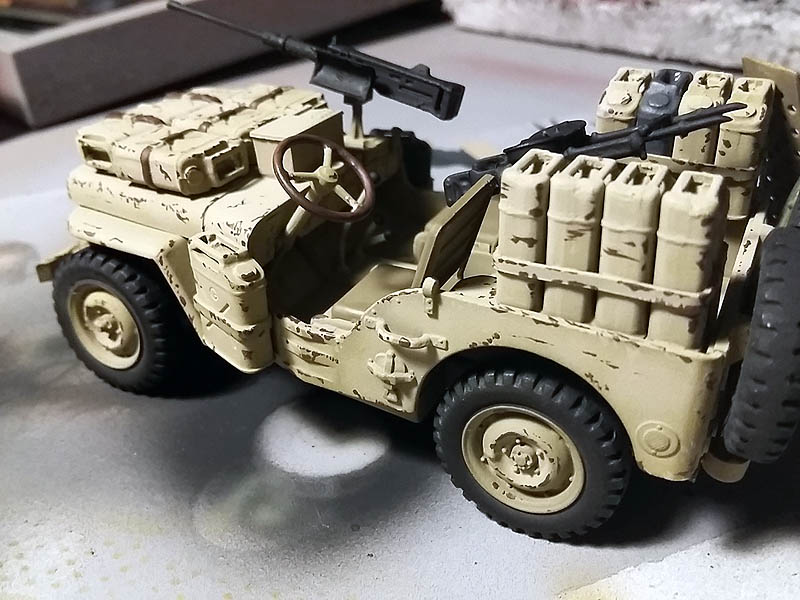
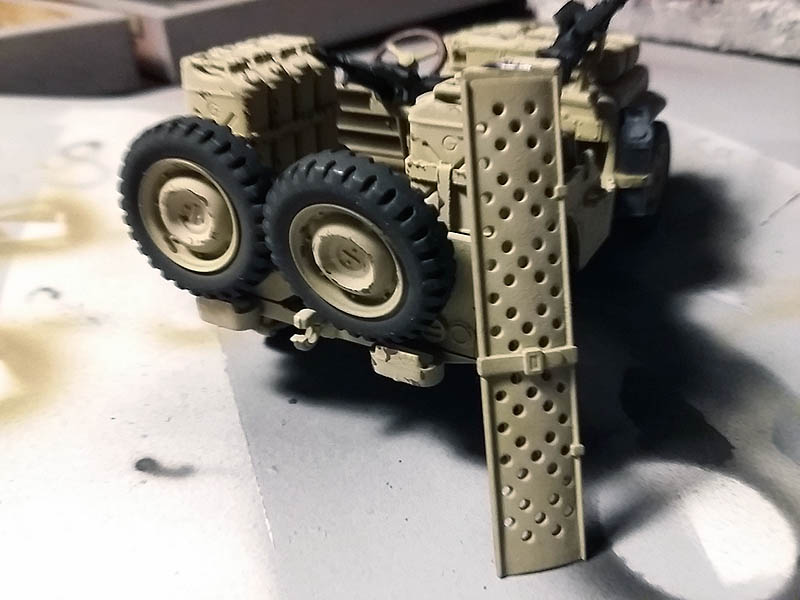
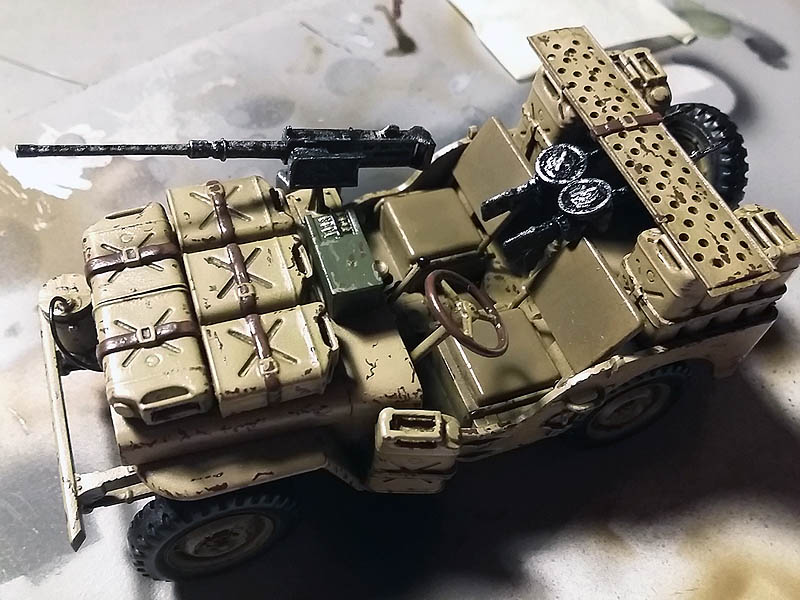
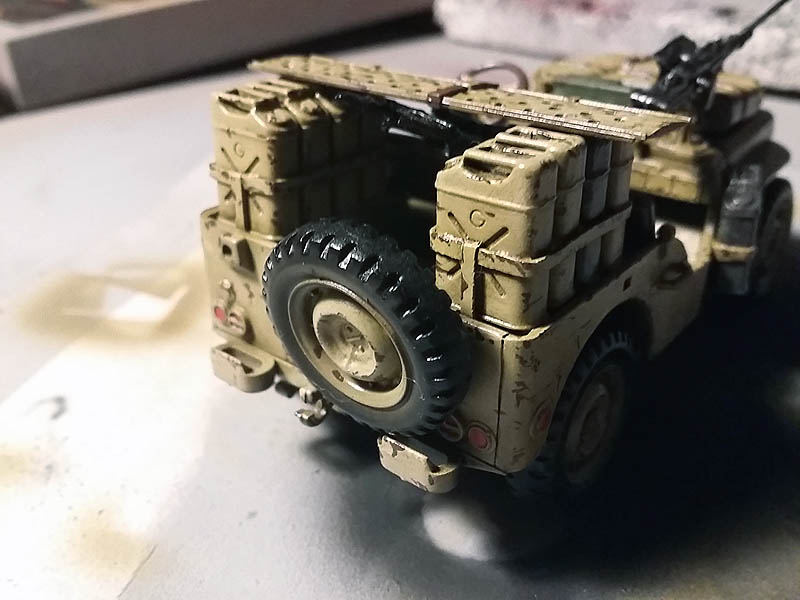
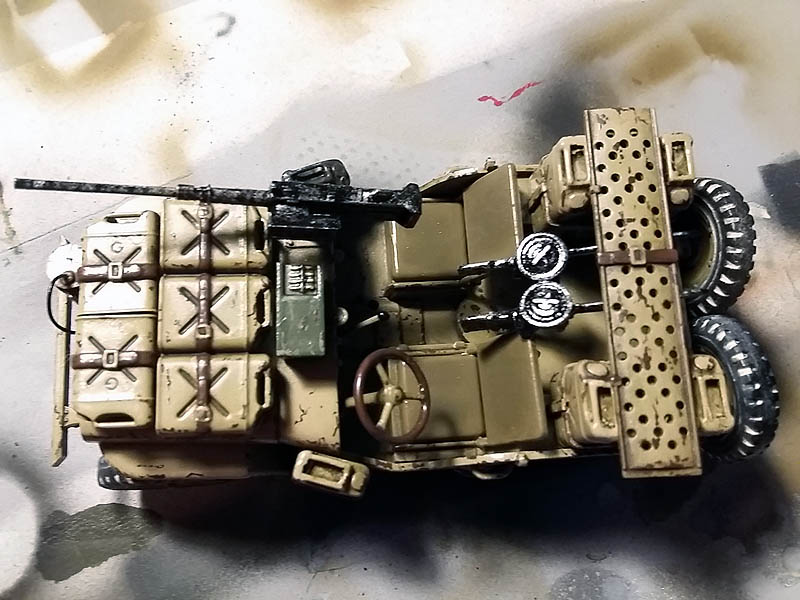
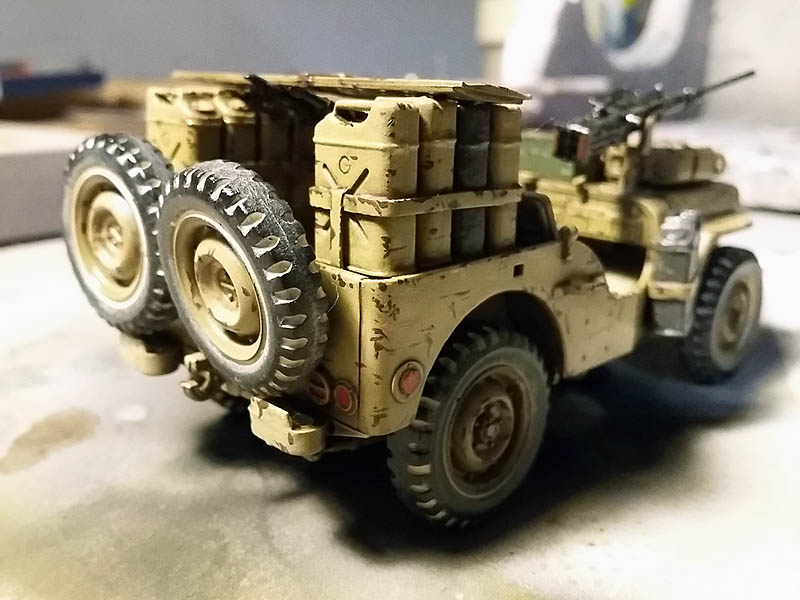
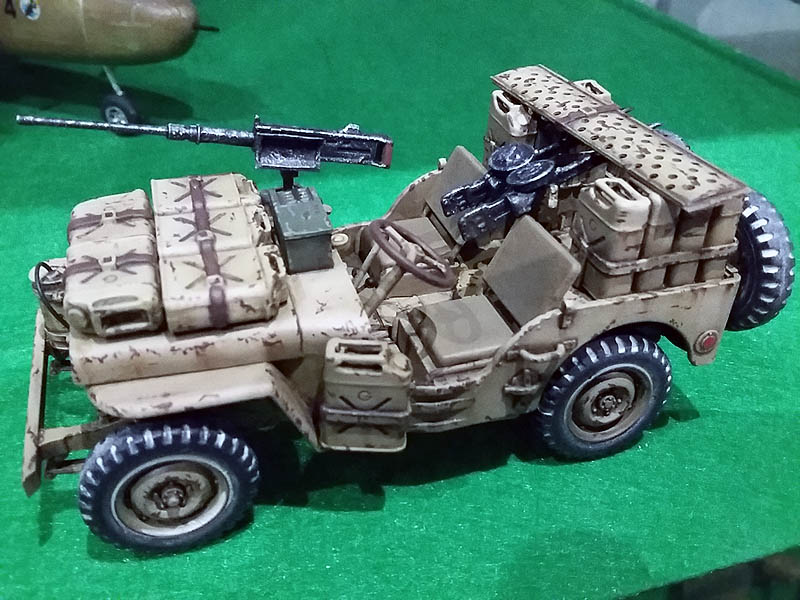
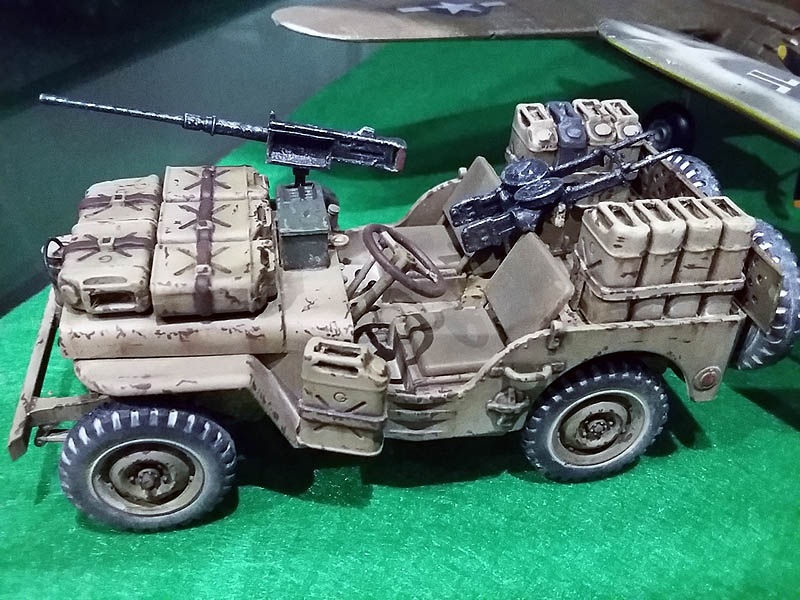
Jeep crossing the desert was like a small boat sailing in the vast ocean. A movement in the wrong direction meant death. For guidance, They are using an instrument called a sun compass, settling in the instrument panel. The direction indicated by the position of the shadow of a cable in the center, that was projected on a sphere. This simple instrument was very useful when the sun shone in the sky. They also used a theodolite for better orientation. The jeep was also equipped with plates for sand. They were made of iron, U-shaped, and measuring about 1.5m long. When the vehicle was stuck in the sand, They put them under the wheels to come out. On the hood, In the back, side and all sites where possible, jerrycans and several bags of skin with water and fuel were placed. Other essential items were a camouflage net to hide the vehicle and a map.
The SAS also had everything needed for day to day, sleeping bags, blankets and food. Each vehicle was equipped with these necessary elements, but they never acted alone. To better face the dangers and possible contingencies, always they are operating in a group of at least two or three vegetables.
In the dashboard and the rear of the body a Browning machine gun and 50mm cannon 7.7mm Vickers K was mounted double or single. The Schemeisser, Luger bullets and machine guns were placed by hand. As usual, the SAS also they used all the weapons captured from the Germans. Members of the SAS They are wearing a shirt half sleeve, Shorts, trencas, aviators own clothes, turbans, etc., according to their preferences. The armament and equipment of the jeep were also variables, depending on the mission and preferences of men. There were two identical vehicles in terms of weaponry and equipment. It seemed that everything had been charged with disorderly, but in reality it is always done with a great practical sense. It required the experience of those soldiers used to fight in the desert for the best organization.
Las S.A.S:
The SAS creation dates back to 1940 when Ia Layforce, a brigade of British commandos, It was sent to North Africa with a mission to conduct raids against Italian troops, but by mid- 1941 the Layforce am practically destroyed and was forced to dissolve. Its technical and operational way were not correct and this paid a high price. David Stirling Layforce integral with the No. Command 8 He began to devise other ways of organizing commando raids. After a parachute accident happened 2 months in a hospital in Alexandria, that's where had the time to think about the new way of action and organization of command.
David Stirling was clearly the functions to be developing the new group had in mind creating:
First to make deep incursions behind enemy lines, attacking the nerve centers of headquarters, aerodromes, supply lines etc.; and secondly to mount a sustained strategic activity from secret bases in hostile territory, and if the opportunity arises, instruct recruit assemble and coordinate local guerrillas.
Furthermore, these missions should be developed in very small groups, 4 the 5 men. Stirling was convinced that 100 highly trained men in groups 4 the 5 more men need little support were able to attack 20 targets simultaneously, creating a small hell on supply lines, quarters, enemy airfields.
And I said to perform their missions could not deal with a chain of command of the army, made it clear with great determination that he would be directly responsible to the commander in chief.
This clairvoyant vision Stirling It is today the basis of the Special Forces and knew how to convey very well General Sir Claude Auchinlek in July 1941 He was commander for the Middle East. By then Auchinlek He was finalizing the Operation Crusader and troops Rommel They were being pushed to the Egyptian border, any idea to get his goal was well supported and Stirling, a man who gave off enthusiasm, security, courage and determination will cost little work to convince. In addition Stirling I present a plan designed to take aerodromes Tmimi y Gazala framed on offense devised by Auchinlek. Given this conviction General Stirling authorize the creation of a new unit. Thus he was born the SAS.
The montage:
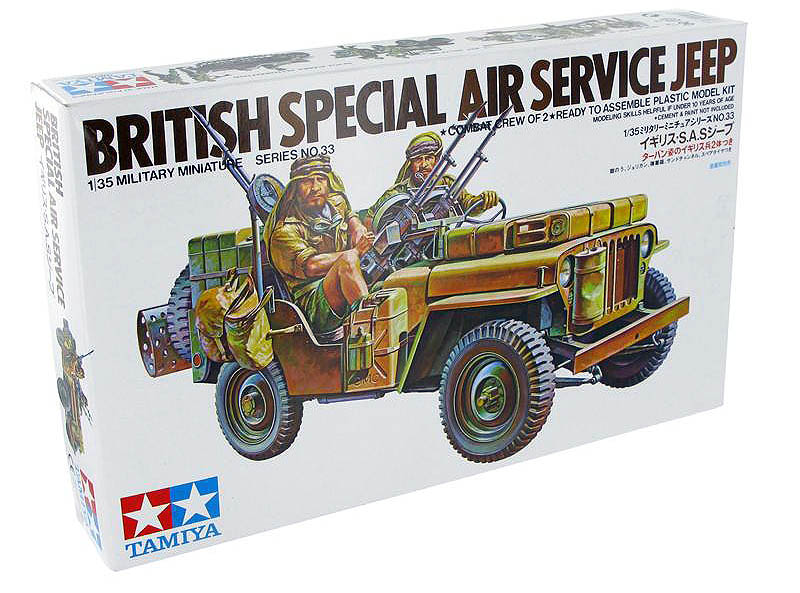
Installation in this case is complex because this kit carries a lot of accessories added to the vehicle, as metal drums of water and gasoline called "Jerry Can", networks, bags, canteens, ammunition boxes etc..
The anchor of the pieces is passable but you have to work a bit on all the wheels and cans, eliminating excess and burrs with sandpaper and Cutter.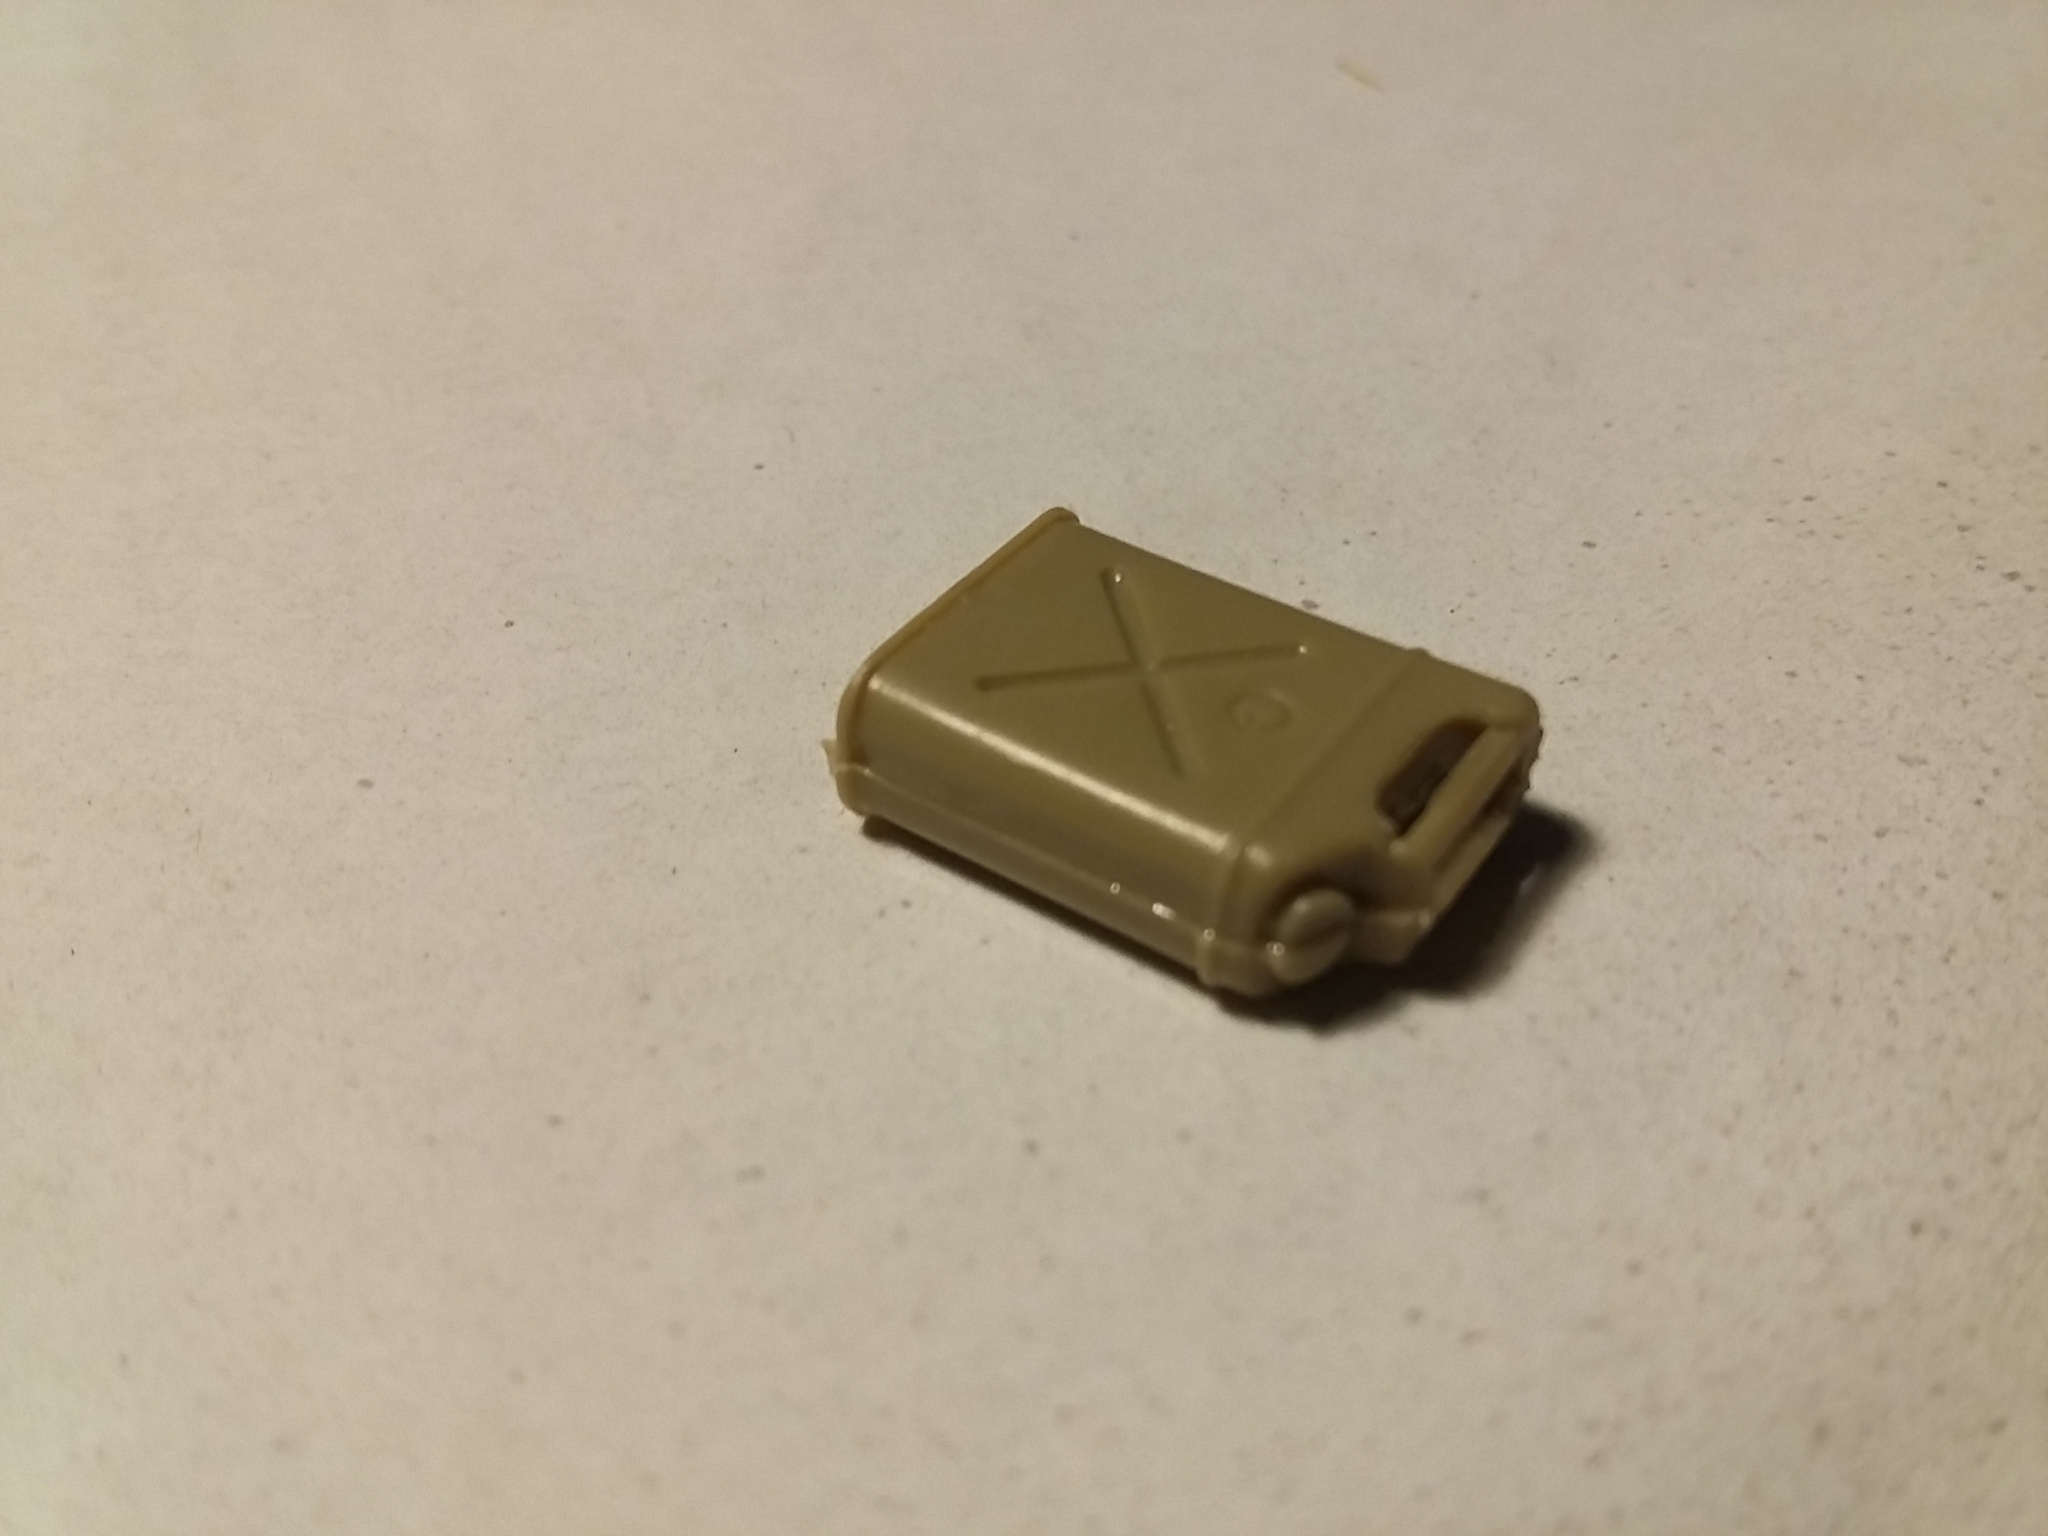 Result after some cutter and sandpaper.
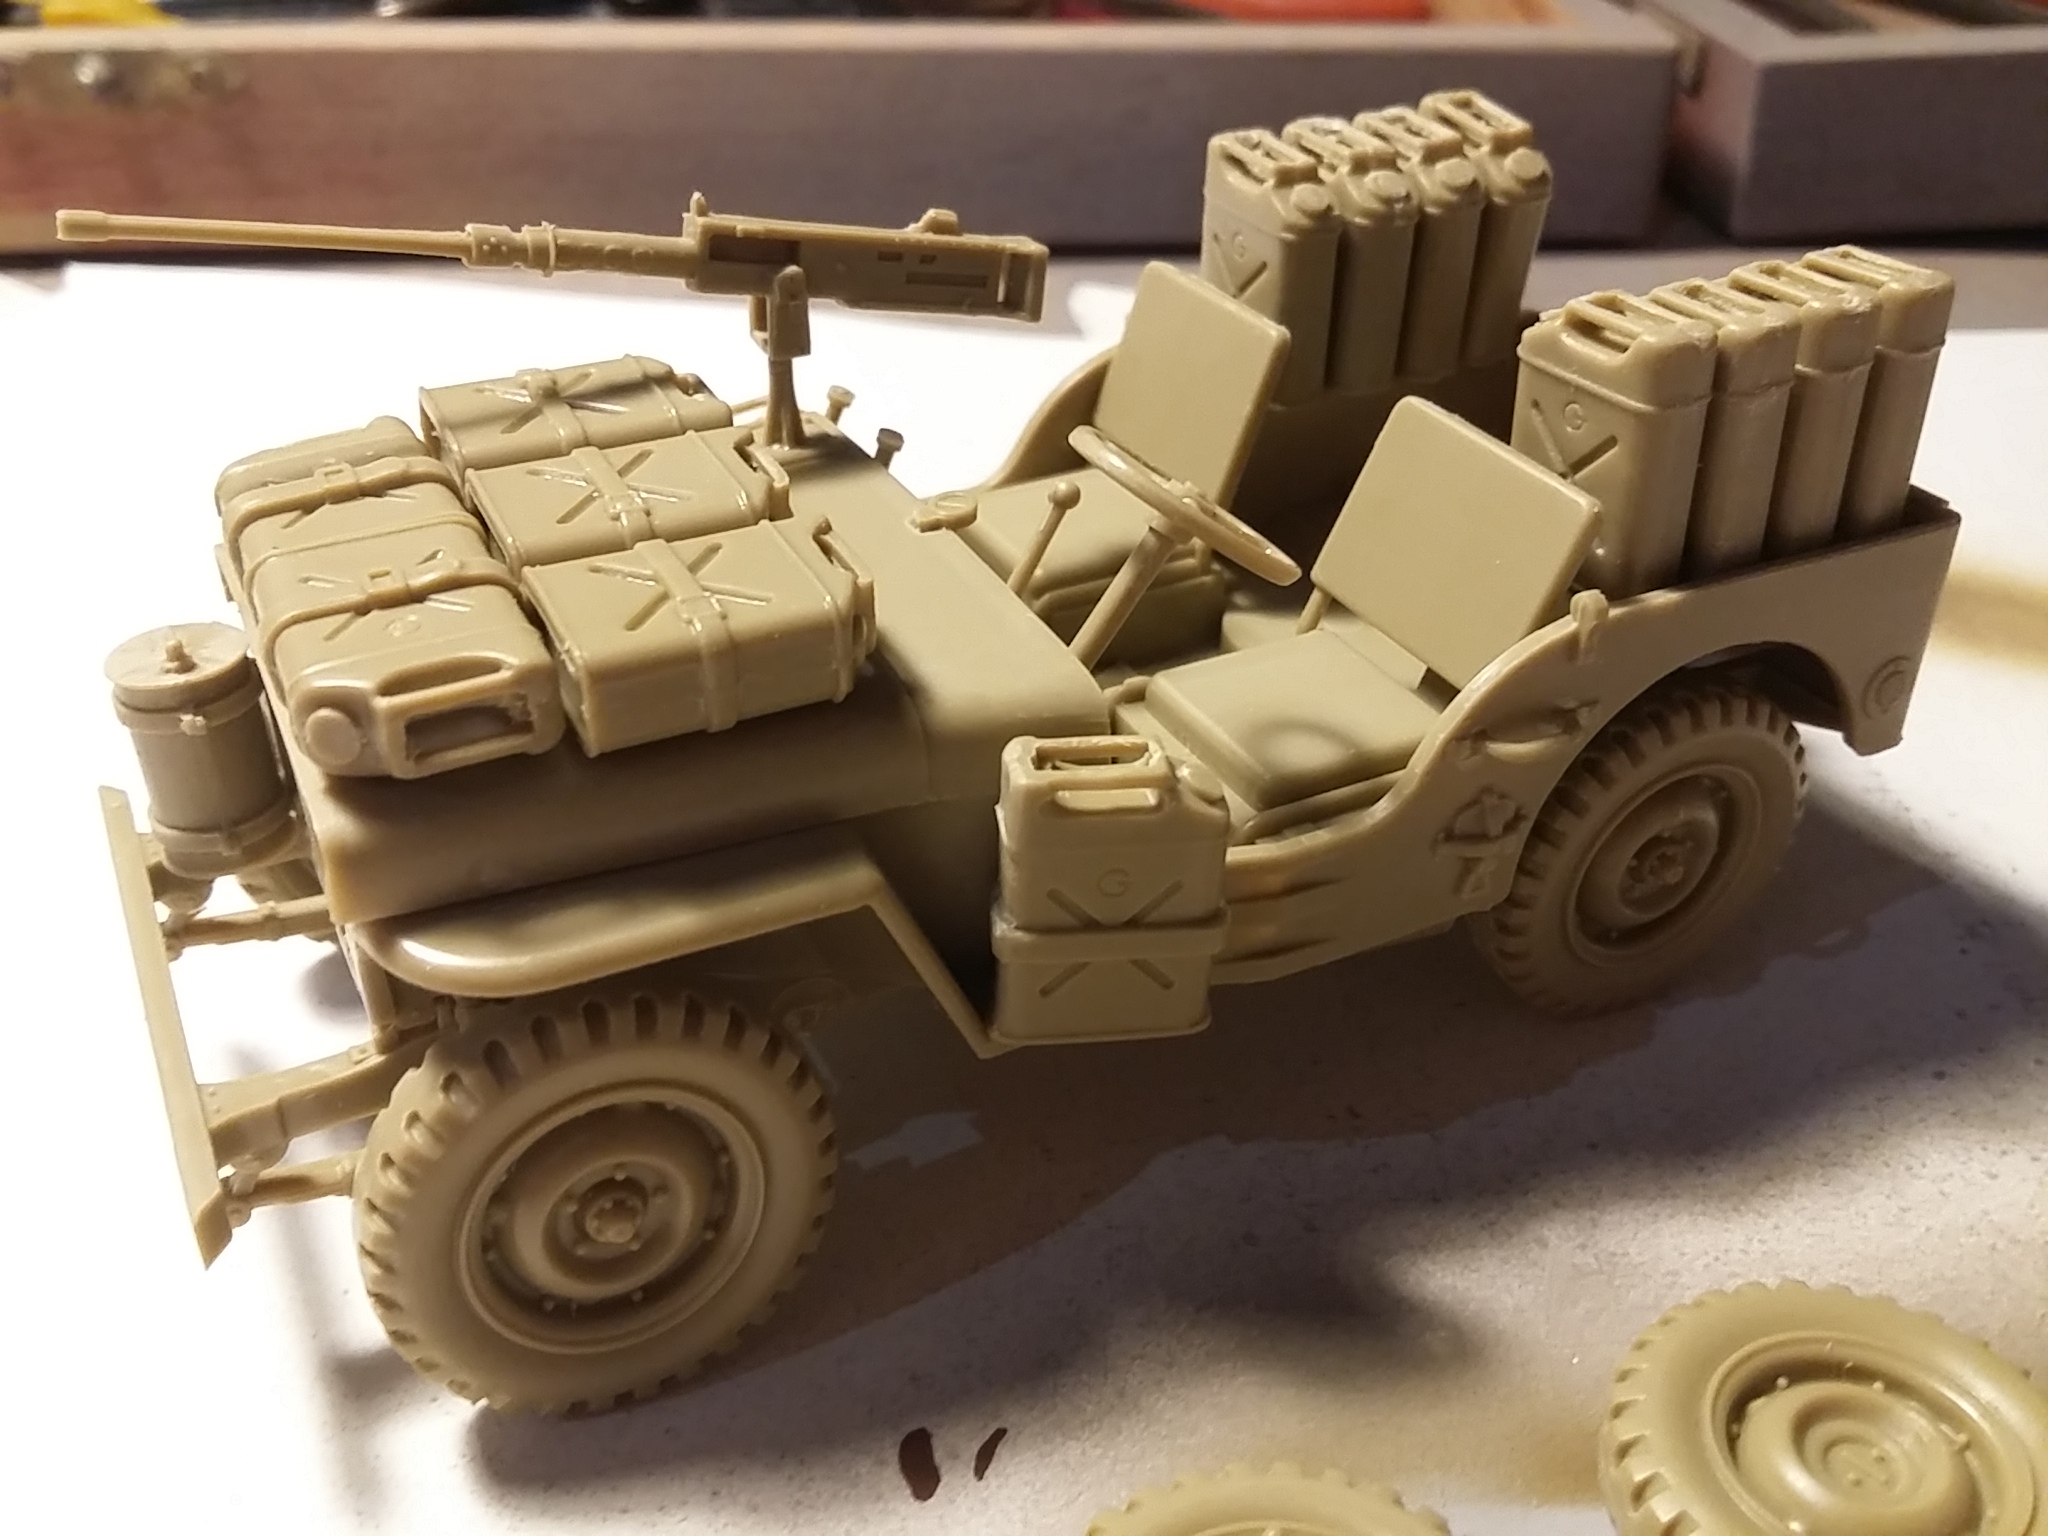
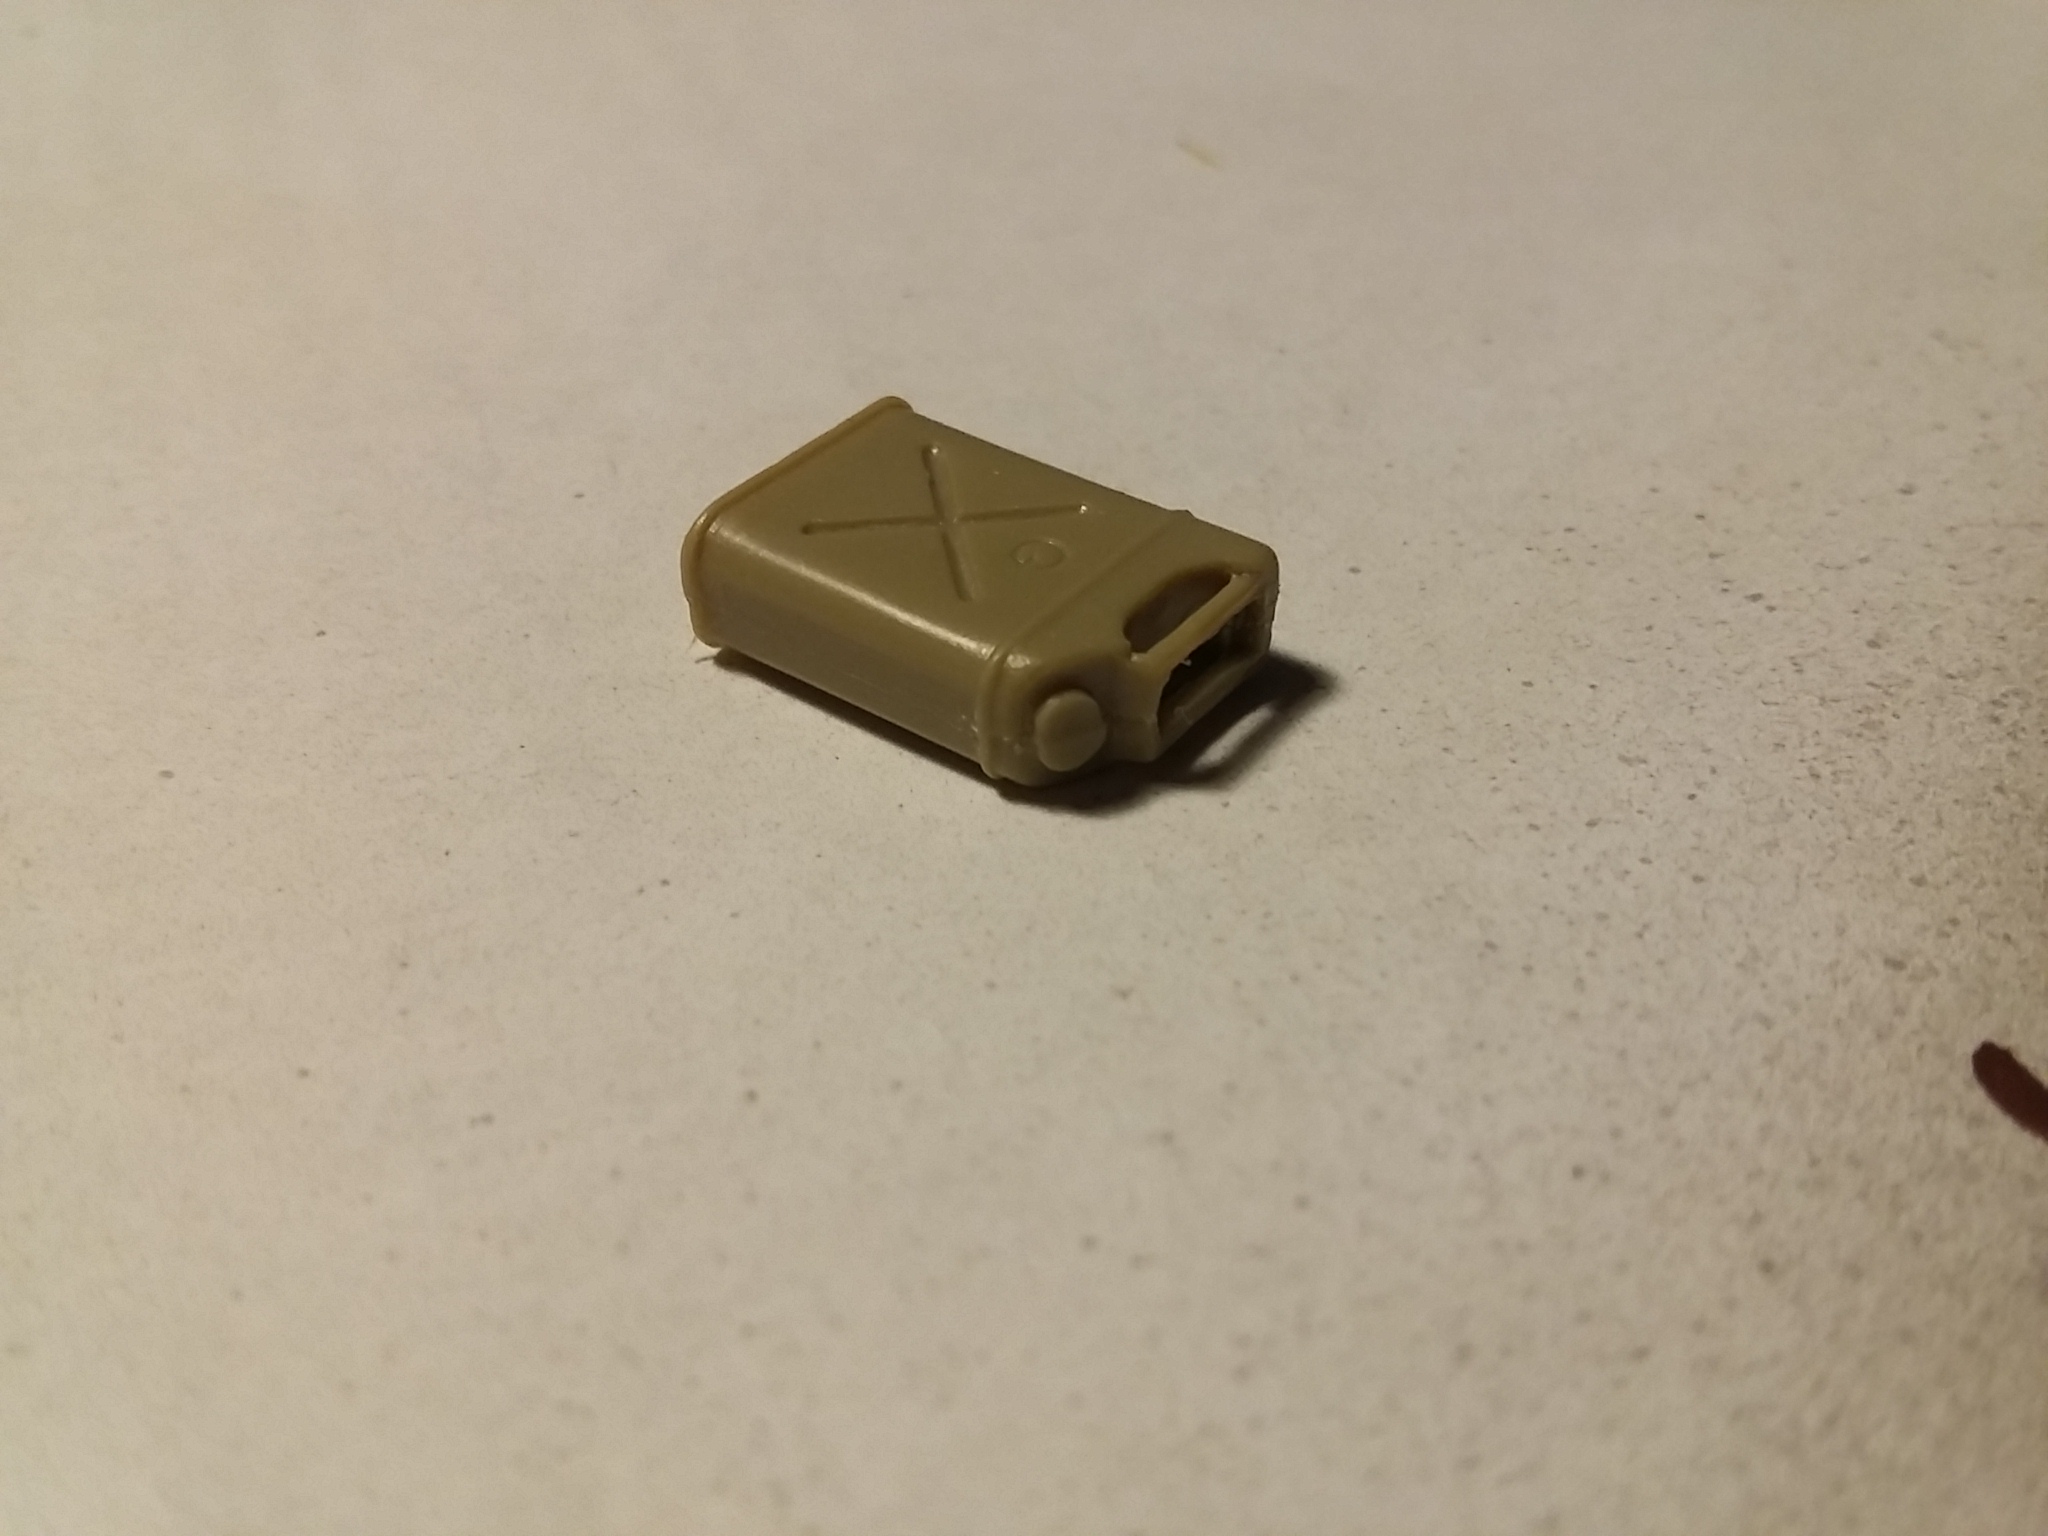 Once work on small parts finished I hit the bulkier the vehicle, You may be performed first and then go paint the pieces and pasting is easier to work small details, the problem is that if you attempt to paste a piece of somewhere with difficulty can damage the paint job so I prefer to stick the larger part and paint work piece glued.

 To the Jerry can I made it back support with "Evergreen".
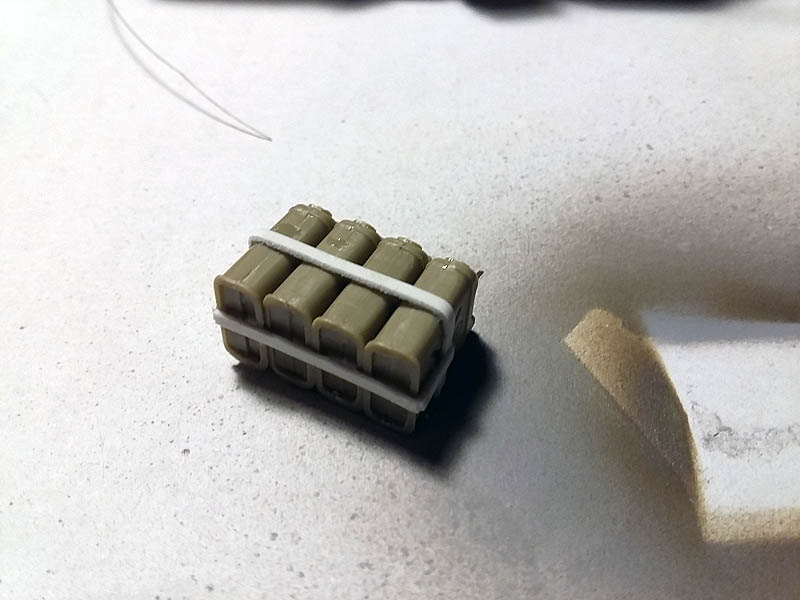
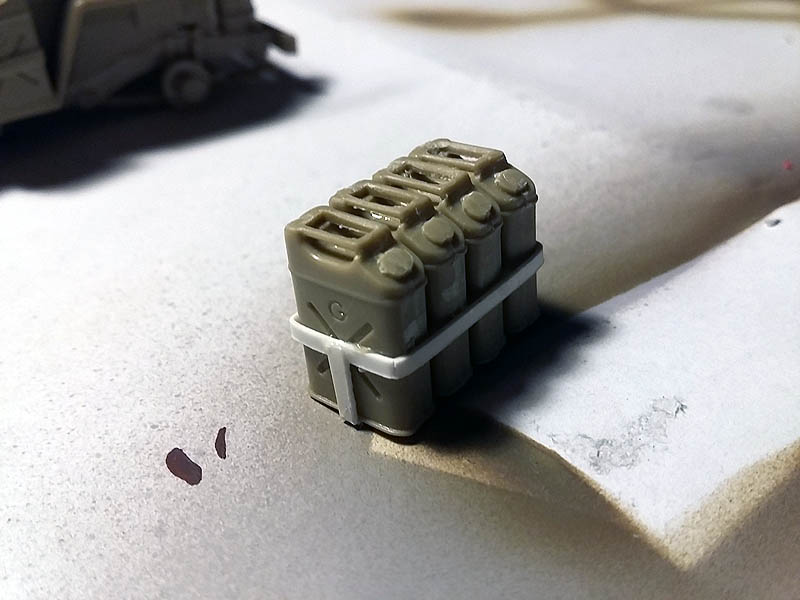
Fixed to the rear.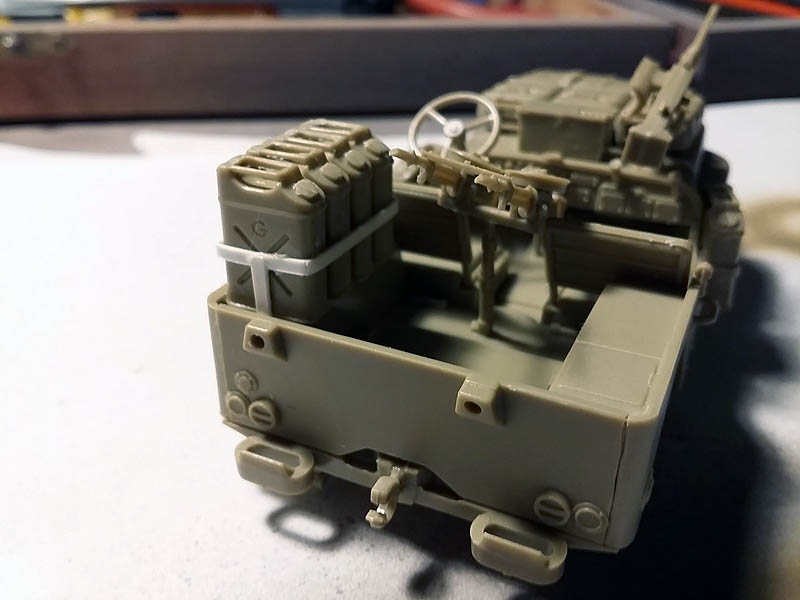
 Stretched plastic tube radiator add to condesandor.
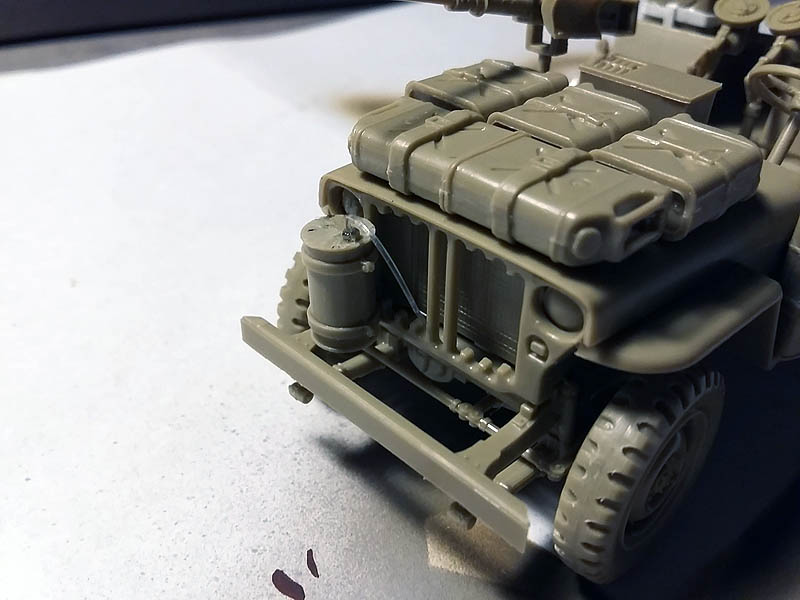
 Once completed and pasted everything I need step by step painting.
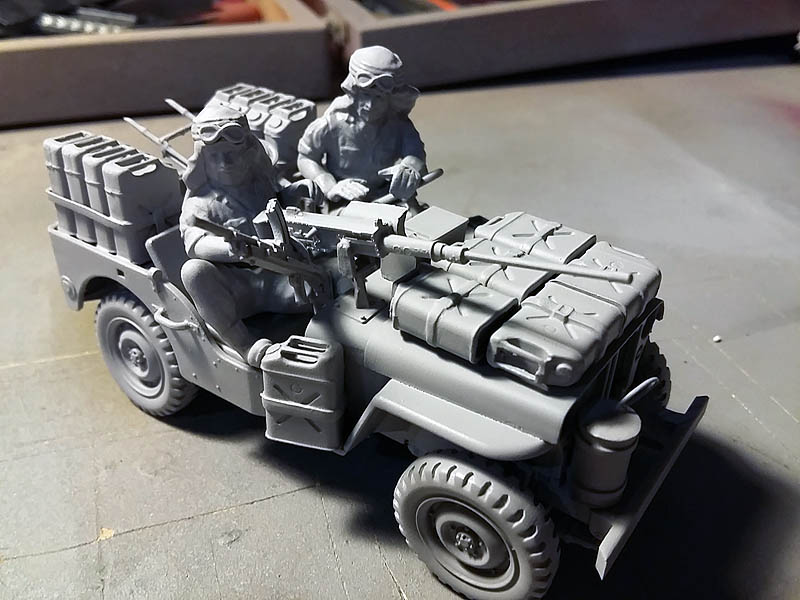
First of all gray primer coat and a view of how to stay with the installed figures but not glued.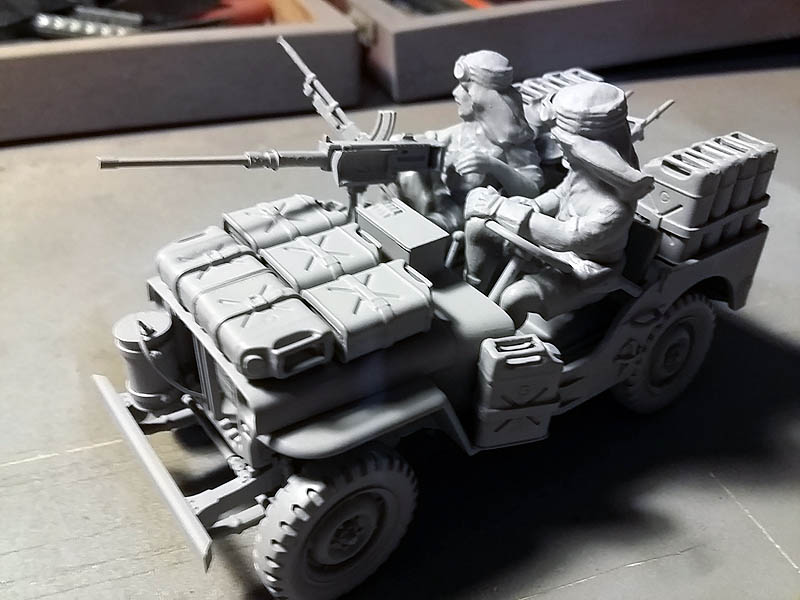
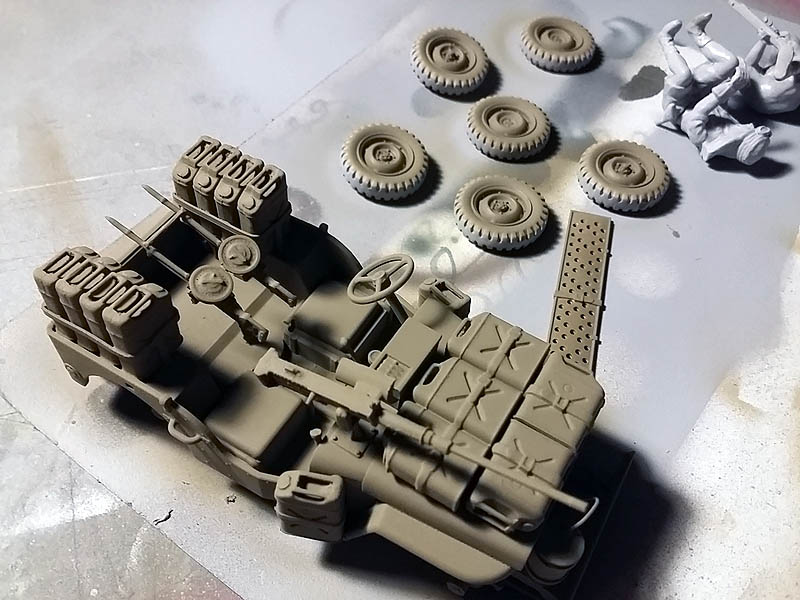
 I start with painting, for this I use three colors of Tamiya, for the base I use kaki XF-49 clarifying which go as you add lights, for the first looks will use the XF-60 dark yellow and finally Color before (Buff) XF-57.
Apply the khaki.
 Apply at first light with dark yellow.
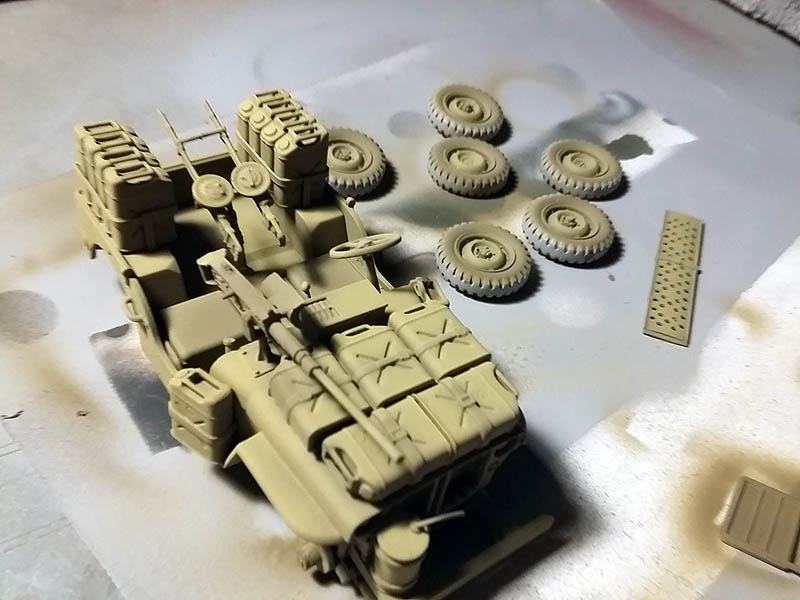
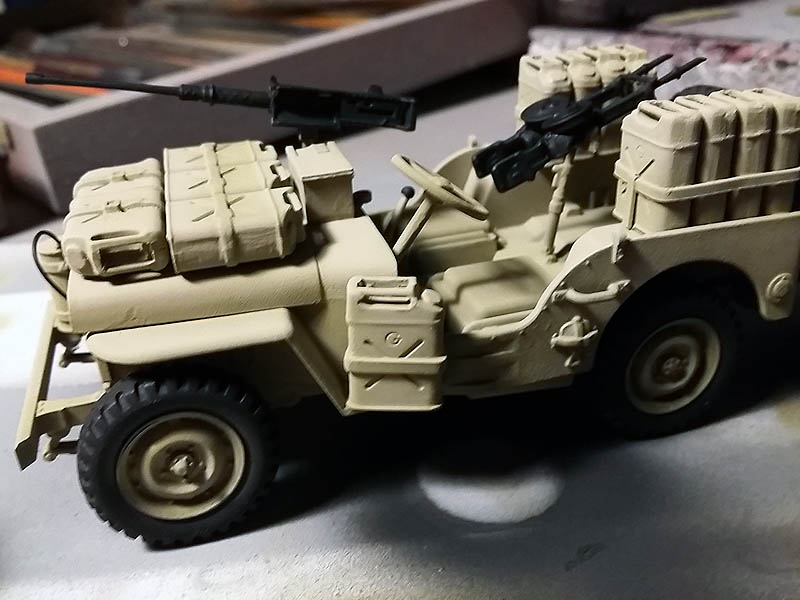
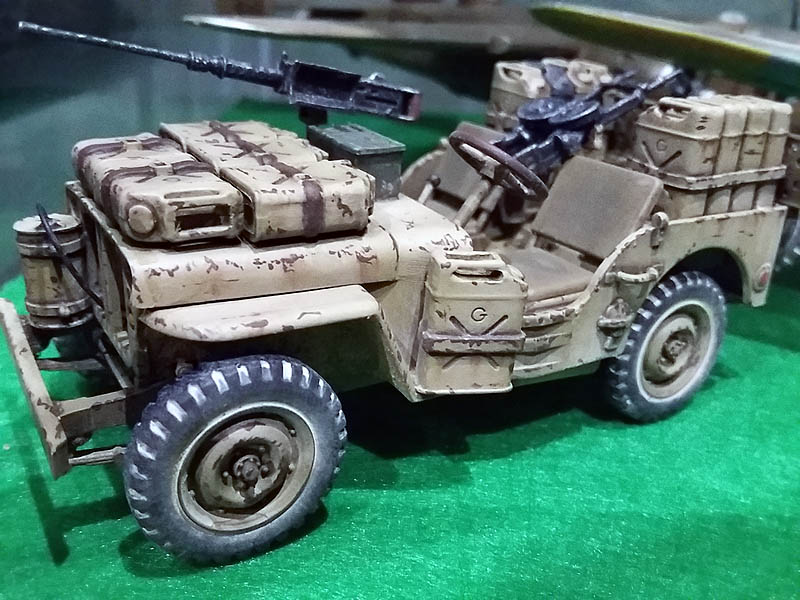
And finally the ante (Buff).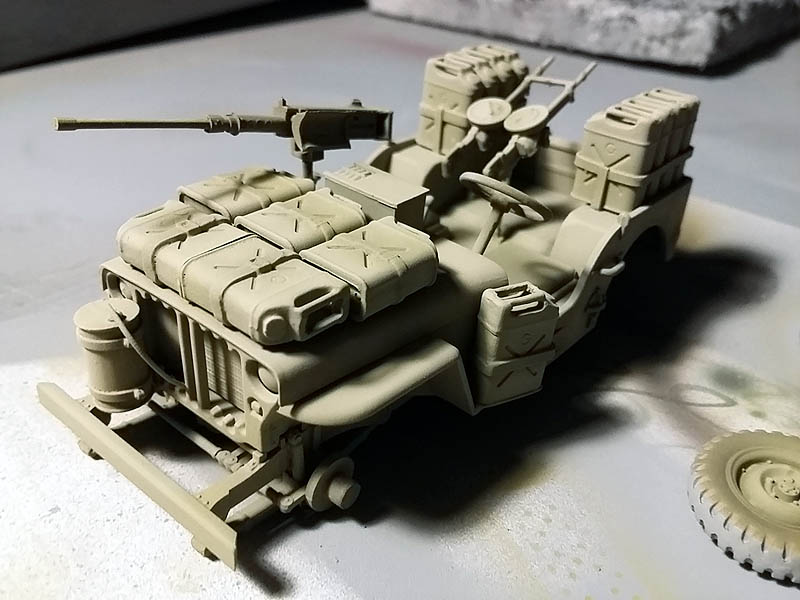 The next step is to make weapons and painted tires and other parts of the vehicle that will use color XF-1 black de base.
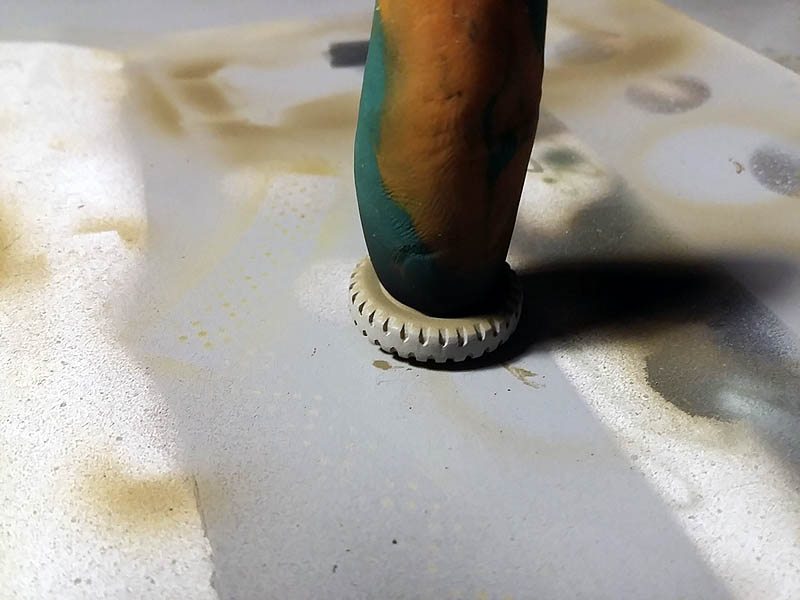
For tires I create a template with clay which I find more comfortable than other adhesives and the result is pretty good.

 Pinto gum far this radiator to the condenser.
 With reddish brown XF-64, paint the handout and straps that hold deposits and apply a hood lights Born Brown XF-68.
For descorches and I use rust Brown XF-10.
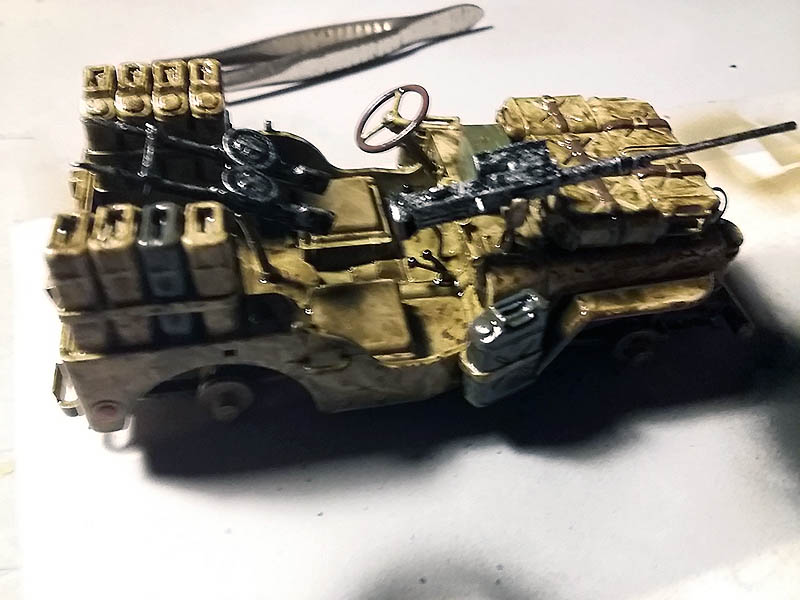
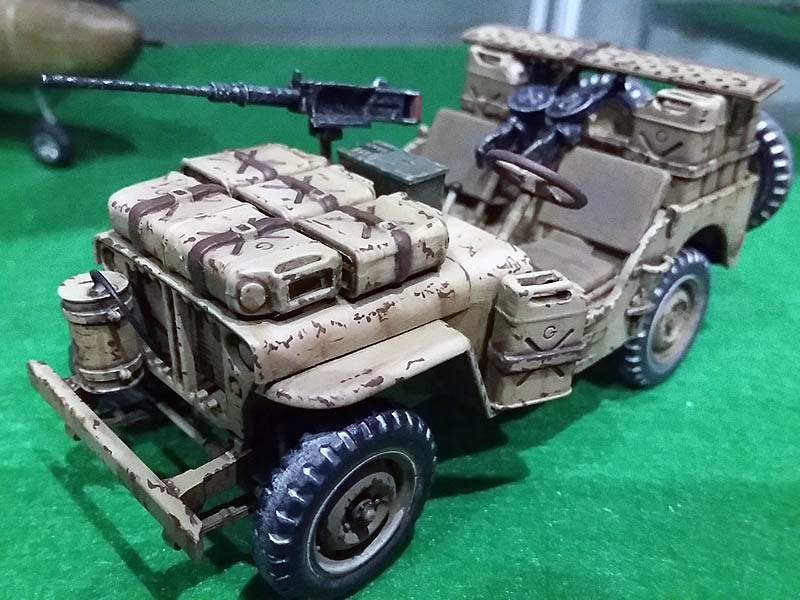
 To give a bit of color and break that decided yellow color paint two cans of gasoline color XF-63 German Grey simulating two cans captured German.
And the driver and passenger seats khaki.
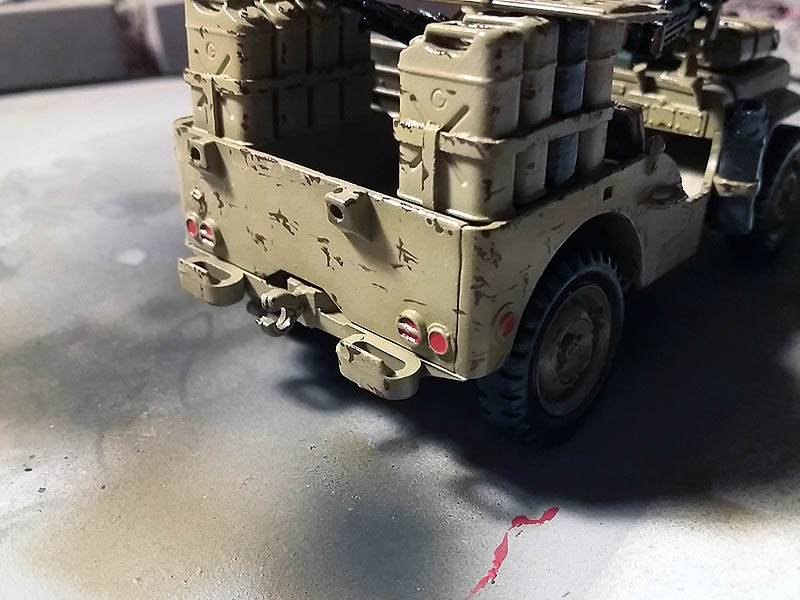
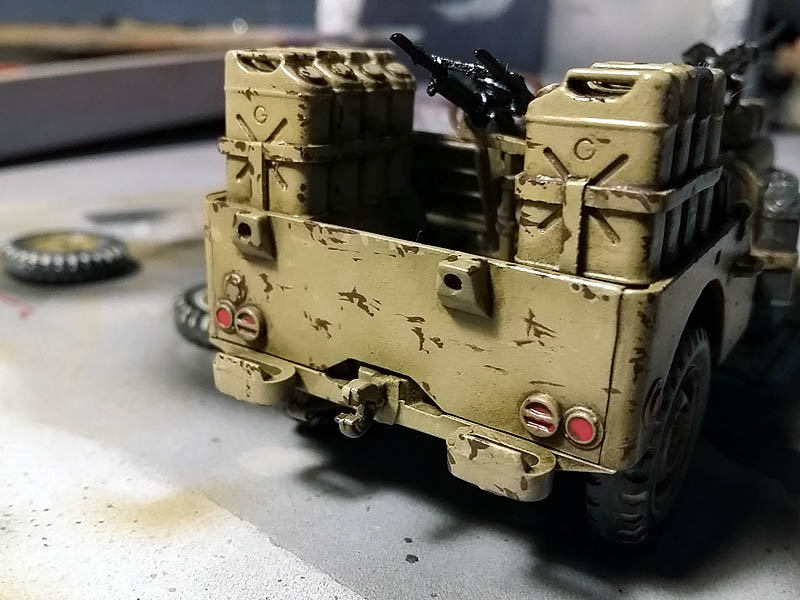
 I'm painting some details of the vehicle, as the taillights which red paint and box of ammunition for Browning 50 I paint Nato Green.
 Once the detail work step-finished with varnish XF-22 glossy varnish Tamiya entire vehicle.
 Let the varnish dry at least 24 hours and once dry apply a washing step in brown for light vehicles, this darkened nooks and will blur some color shades that I have applied to the vehicle.
 I apply the wash wheel and metal leggings.
 I pass a few minutes and remove the excess with a rag and some buds for ears to remove all.
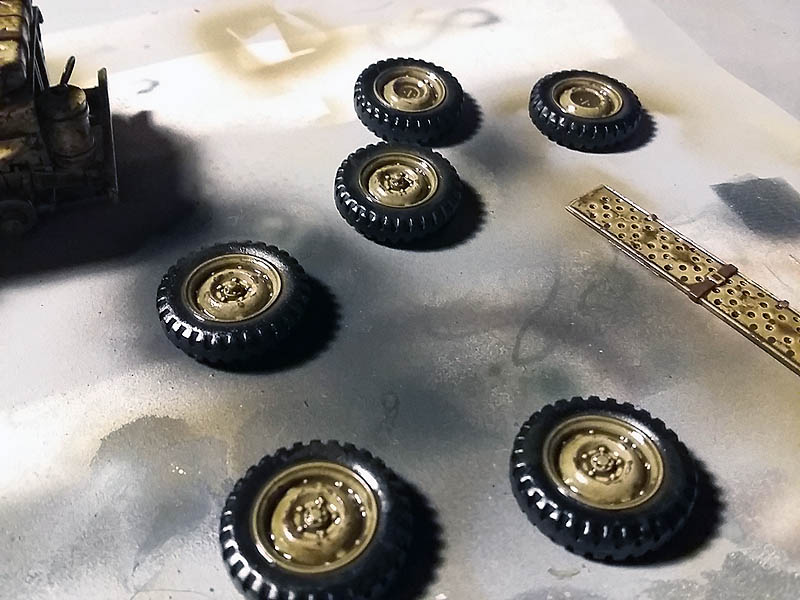
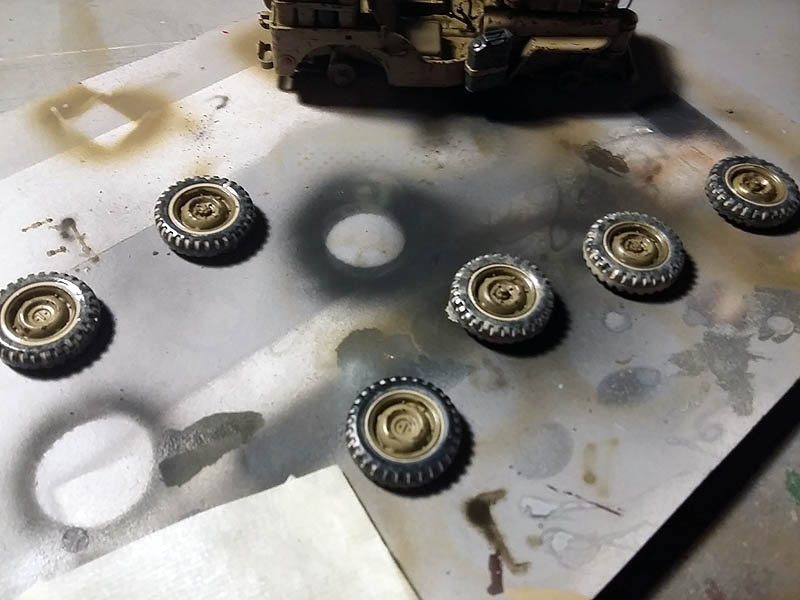
 Step to the wheels and to give an appearance of dirt dust and desert sand give some past dust effect wheels and then remove the excess to achieve the desired effect.
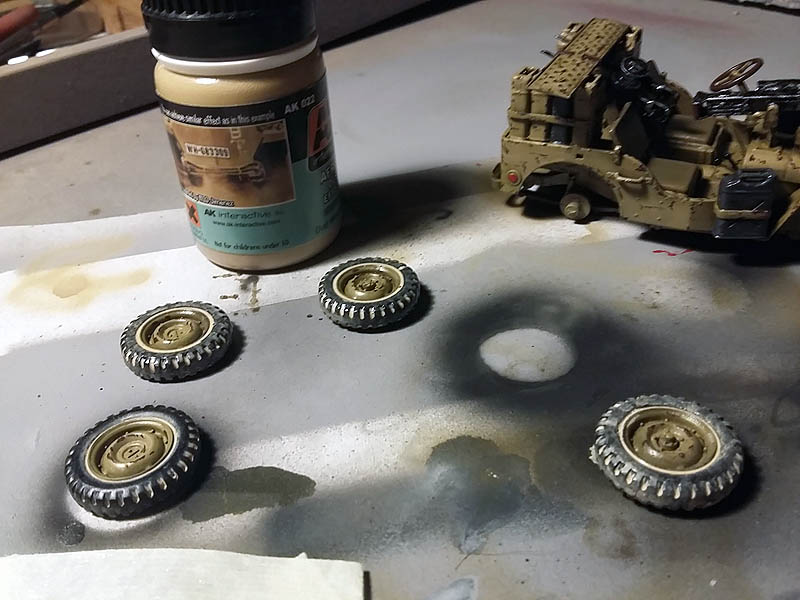
 The next step is to darken some lines like the bonnet, cans, handles, headlight boundaries etc.. for this I will use a fine-tipped brush and dark brown oil highly diluted in aguarrás, turpentine the White spirit de (AK-Interactive).

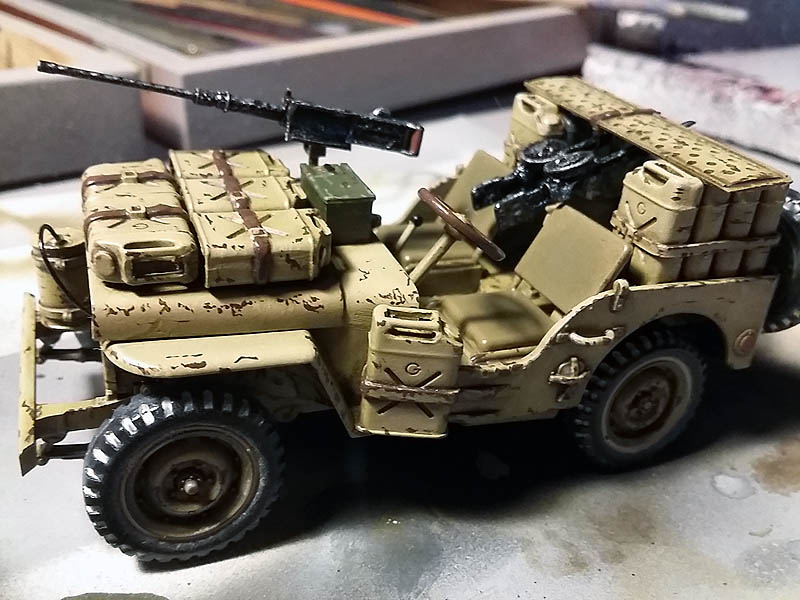
 Once applied the oils and a good dry time I varnish with satin varnish Vallejo (Ref. 70522) to protect the work and move to apply small chorretones and Stains, for which I use the product AK-Interacive Streaking grime, applying rust chipped in with a fine brush and flat the scatter in the natural direction of gravity.
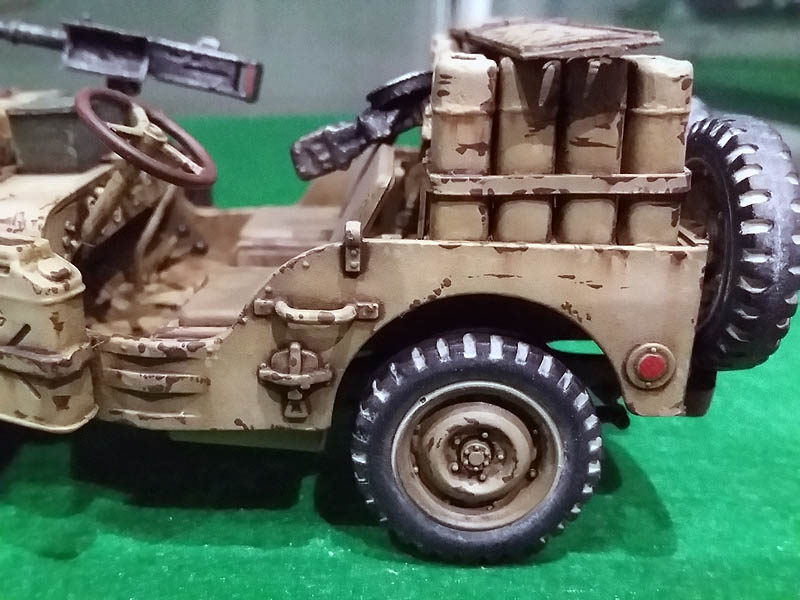
 This same process is applied in all parts of the vehicle desired, cans, handles, bumper, low, etc.
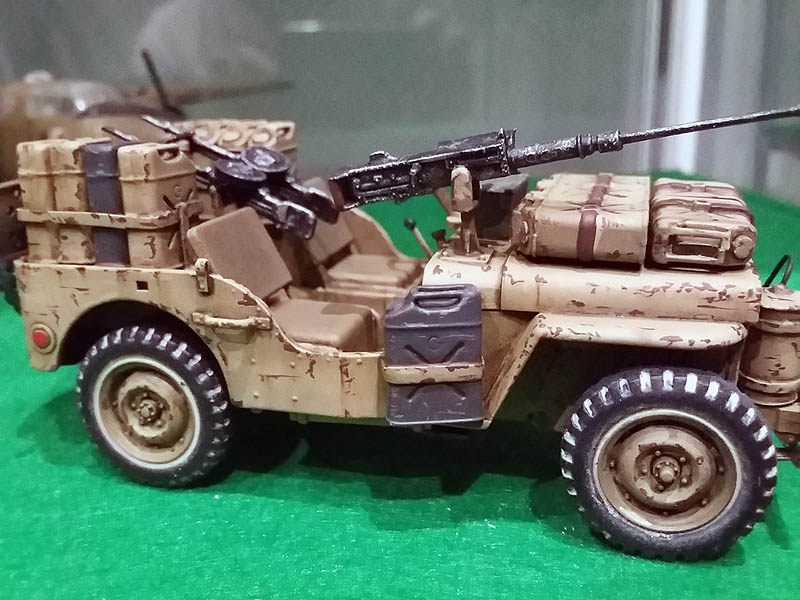
 To give a little more realism I apply pigments in key parts of the vehicle underbody, low fenders and tops which can accumulate dust, the interiors of drivers where lie the feet and corners and side near the wheels etc.. To simulate this powder pigment Africa I have used is the “North Afrika Dust” de Ak-Interactive (Ref. AK-41).
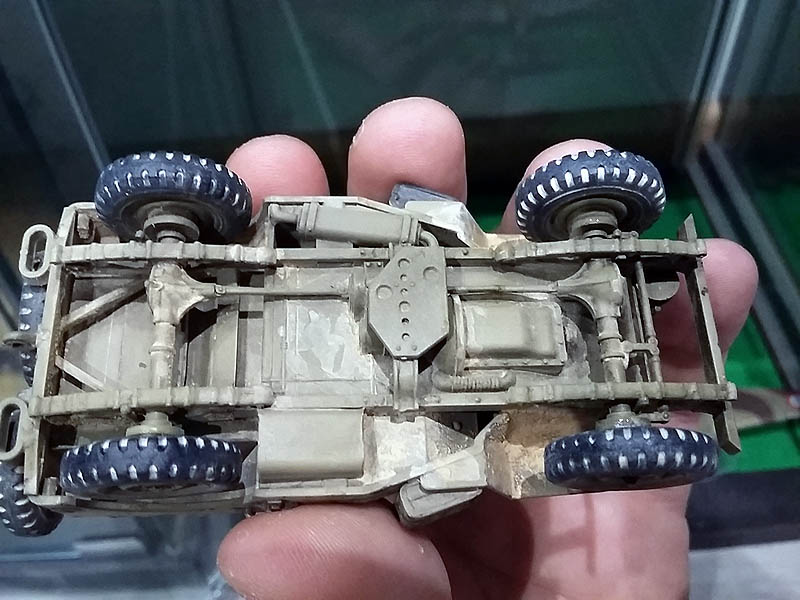 To fix them in abundant quantities I use liquid fixative “Pigment Fixer” in this case the mark AK-Interactive (Ref. AK-048) but also works well turpentine, usually it finds abundant accumulation of mud and dust for example in the basement of the four-wheel fender and some underbody, a dusting parts where you have to accumulate and a contadotas I moistening, Dust floor using a dry brush with which I apply the powder stroking on the party then fix it remove the excess with another clean dry brush.
 I also apply with dry brush on the tires and wheels to give a little more dirt and to the lower parts of the drum subject to the side of the fender.
 I like a soft effect of dirt, Better not get to spend it more difficult to recover after the previous appearance that we can go slowly adding.
Ending with the dolls ...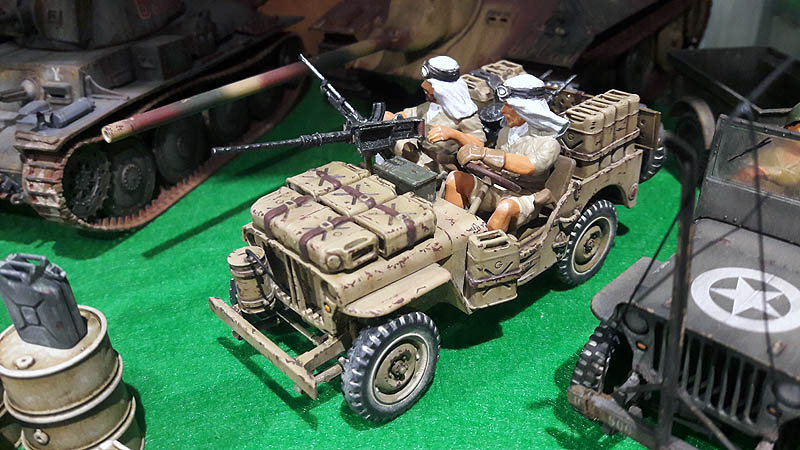
TO BE CONTINUED ...
Autor Armand C.M.